
- About ZenTao Enterprise
- Installation
- Update and Upgrade
- 3 Update ZenTao Enterprise
- 3 Upgrade from Open Source to Enterprise
- 3 Upgrade from Pro to Enterprise
- Users and Privileges
- DevOps Management
- Office Automation
- Feedback Management
- Document Management
- Workflow
- 9 Build-in Workflow
- 9 Workflow Introduction
- 9 Example: Customize Build-in Workflows
- 9 Example: Add a Workflow
- 9 JS and CSS
- ZenTao Desktop
Example: Customize Build-in Workflows
- 2019-09-03 13:09:50
- John Ten
- 3518
- Final Edition:tengfei De 2020-05-21 09:48:49
Build-in workflows in ZenTao can be customized.
If you have read the chapters about workflow before, you would know that it is developed based on workflows, features, and customization in ZenTao, and has built in 12 workflows, namely Product, Plan, Release, Story, Project, Build, Task, Bug, Case, Request, Suite, and Feedback.
For build-in flows, you can only view, edit, manage fields and actions. You can do add label sub flows, child tables to it, neither can you delete it from ZenTao.
Take the workflow of Bugs in ZenTao as an example, and let's see how flows can be customized.
1. View Fields and Edit
The simple actions of a build-in workflow are Field and Edit.
1.1 Field
On the right column of Actions, you can click Field to check all that related to the Bug view.
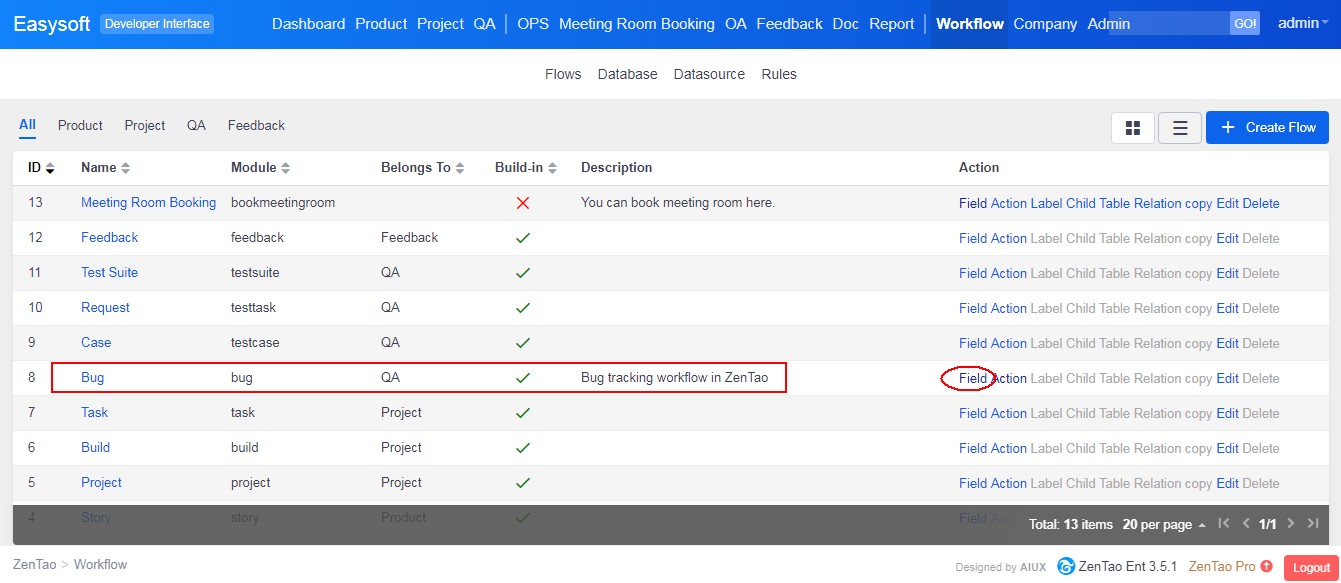
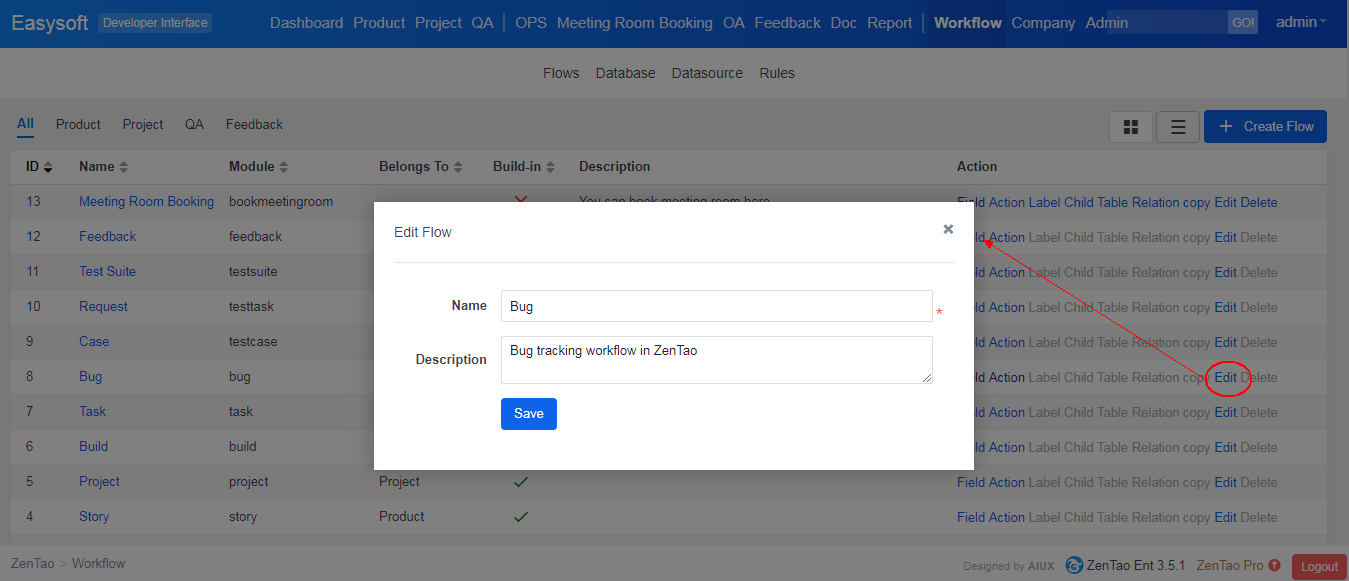
1.2 Edit
Click Edit in the Action column, you can change the name and description of Bug flow.
2. Manage Field
For fields in ZenTao, you can edit it and add new fields to a build-in workflow.
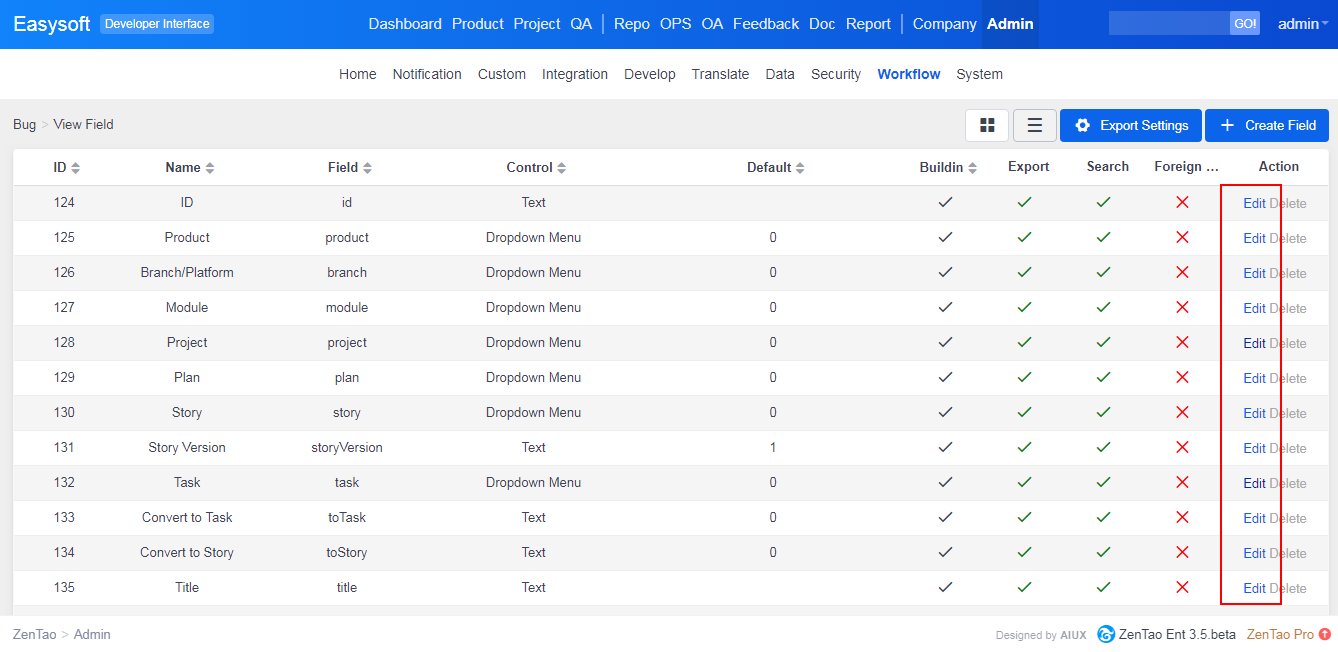
2.1 Edit built-in fields
Click Field, then enter the list page of the fields. You can see all the fields listed here and c lick Edit button to edit it. Build-in fields cannot be deleted.
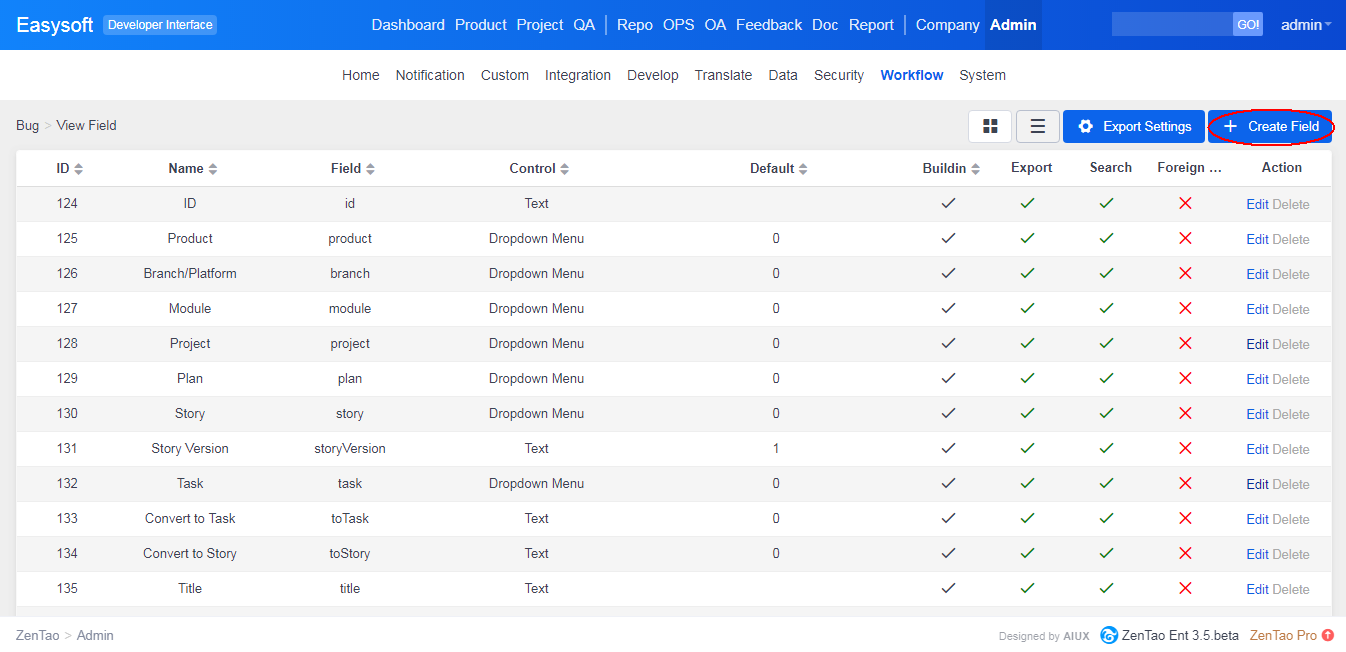
2.2 Create a Field
Click Create Field at the upper right of the page to add a new field to the workflow.
Add a Review Result field to the Bug workflow. Click Create Field and enter the page to add more information for Review Result.
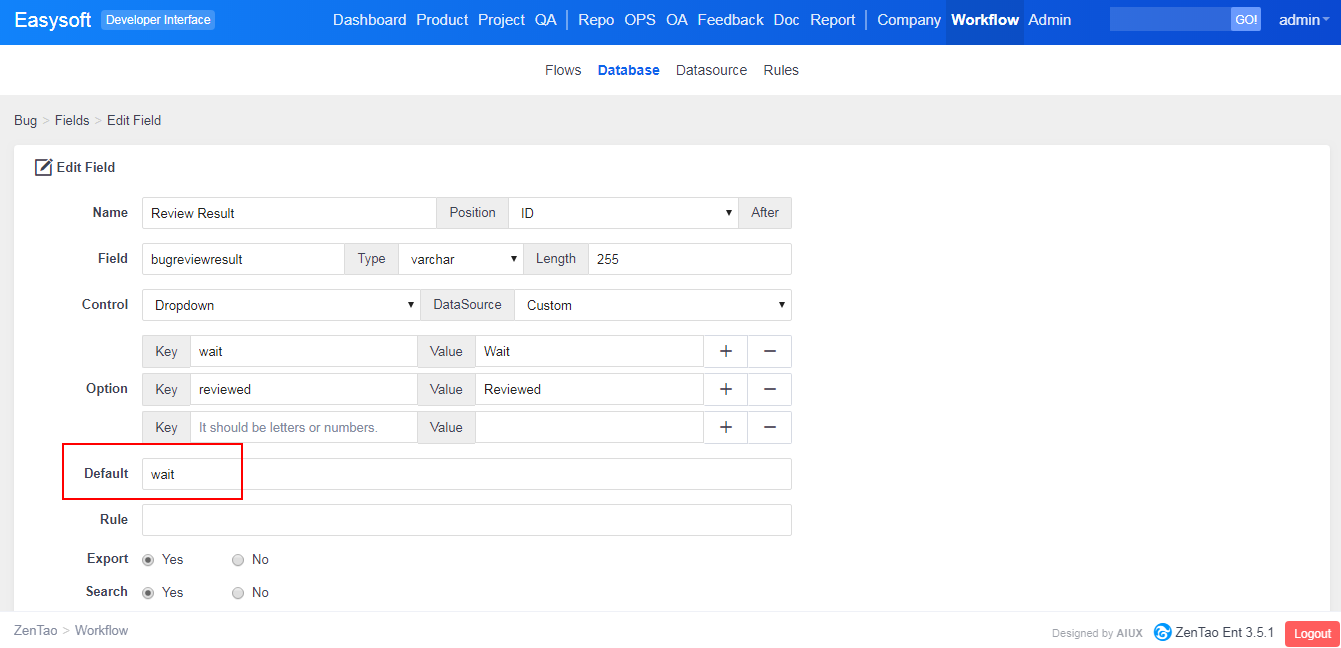
- Name: Data item of a field saved in the database or name displayed on the page.
- Position: It is where the field is displayed on the layout.
- Alias: Letters only for record the field in the database.
- Type: Numbers(tinyint, smallint, mediumint, int, decimal, float, double), date and time(date, datetime, timestamp), and strings(char, varchar, text).
- Control: Labels, text boxes, rich text, date, time, drop-down menus, radio buttons, and checkboxes.
- Default: The default value displayed when a control is selected.
- Rules: It is t verify the format of the data via regular expressions.
- Export: It is to set whether the field can be exported.
- Search: It is to set whether the field can be searched.
- Foreign Key: It is used to display the data of a sub flow, and there can only be one foreign key. Fields set as foreign keys should use the drop-down menu or radio button as the control. If not, it will set the control as a drop-down menu by default and select the data source as a sub flow.
After it is saved, you will see the Review Result field as shown below.
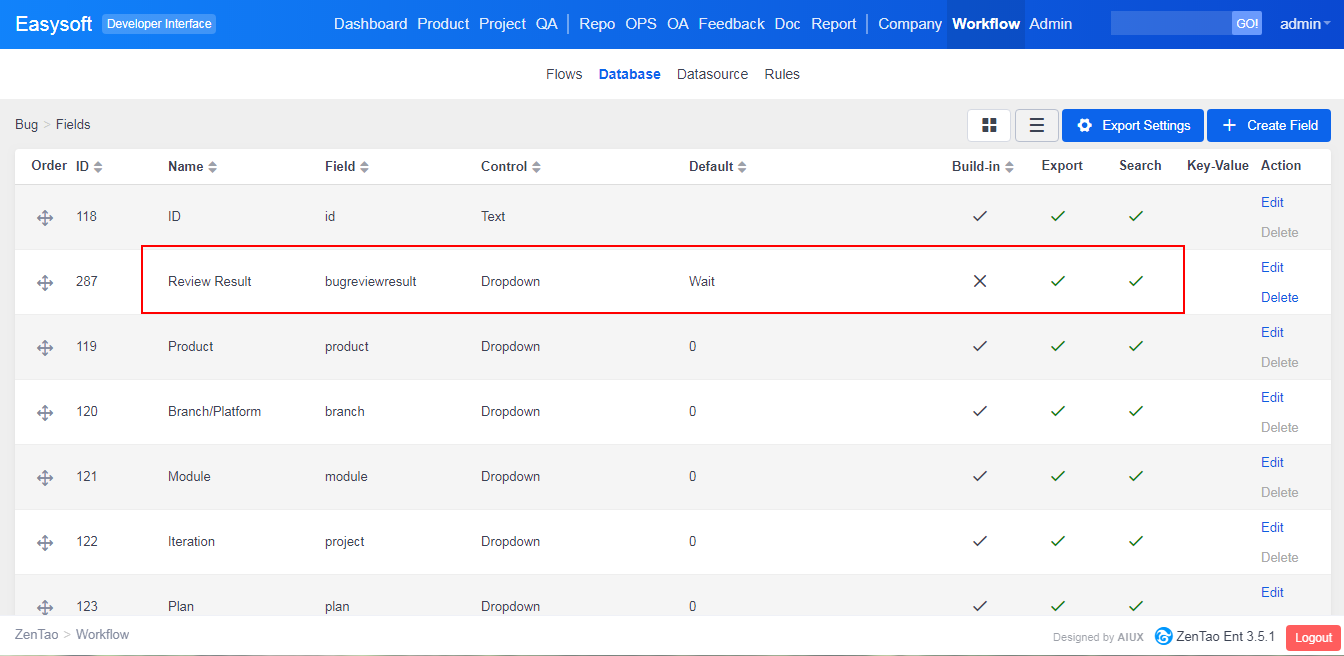
Note: Make sure that you checked the Review field you just added in Action, so it will be displayed. For this Review action, you have to edit the action and change the Extended Type to Extend.
3. Action
Continue with the Field that has to be checked in Action page.
3.1 Display the added field on the action page
The default extended type for build-in flows in ZenTao is not Extend, therefore you have to change it to Extend first.
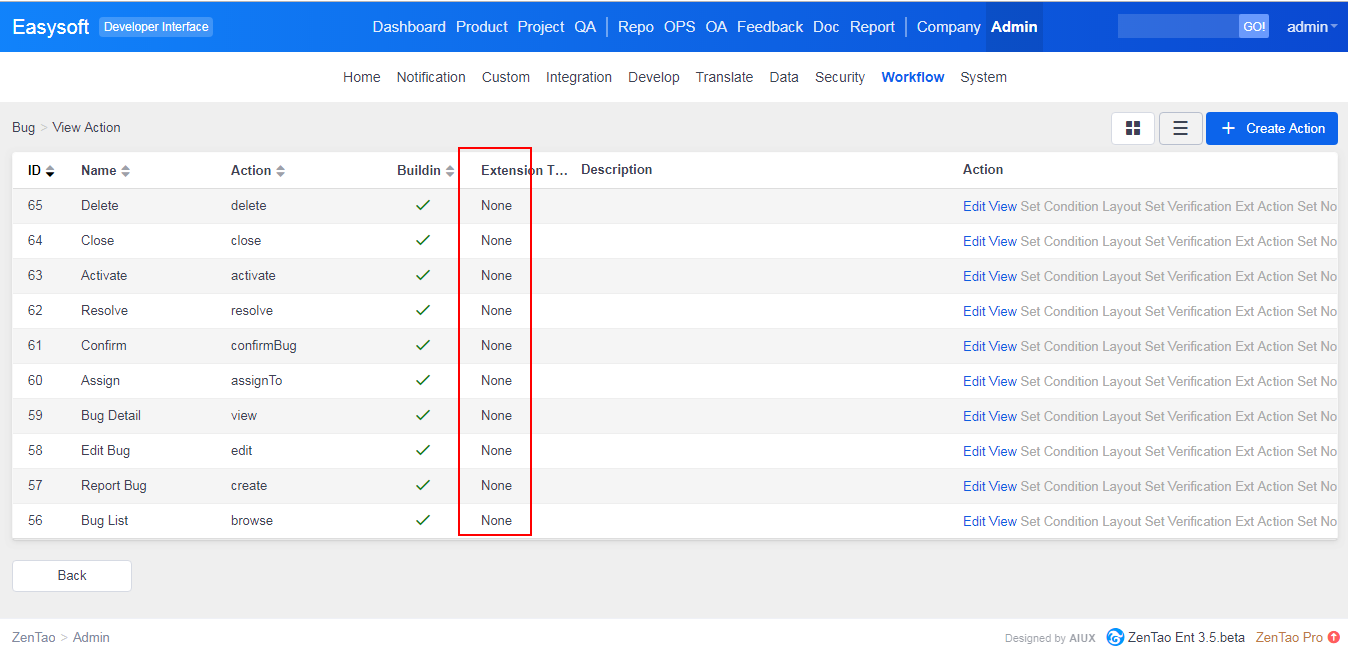
Click Edit button of the action that you would like to edit and select Extend from the Extended Type drop-down. Take Bug Detail as an example.
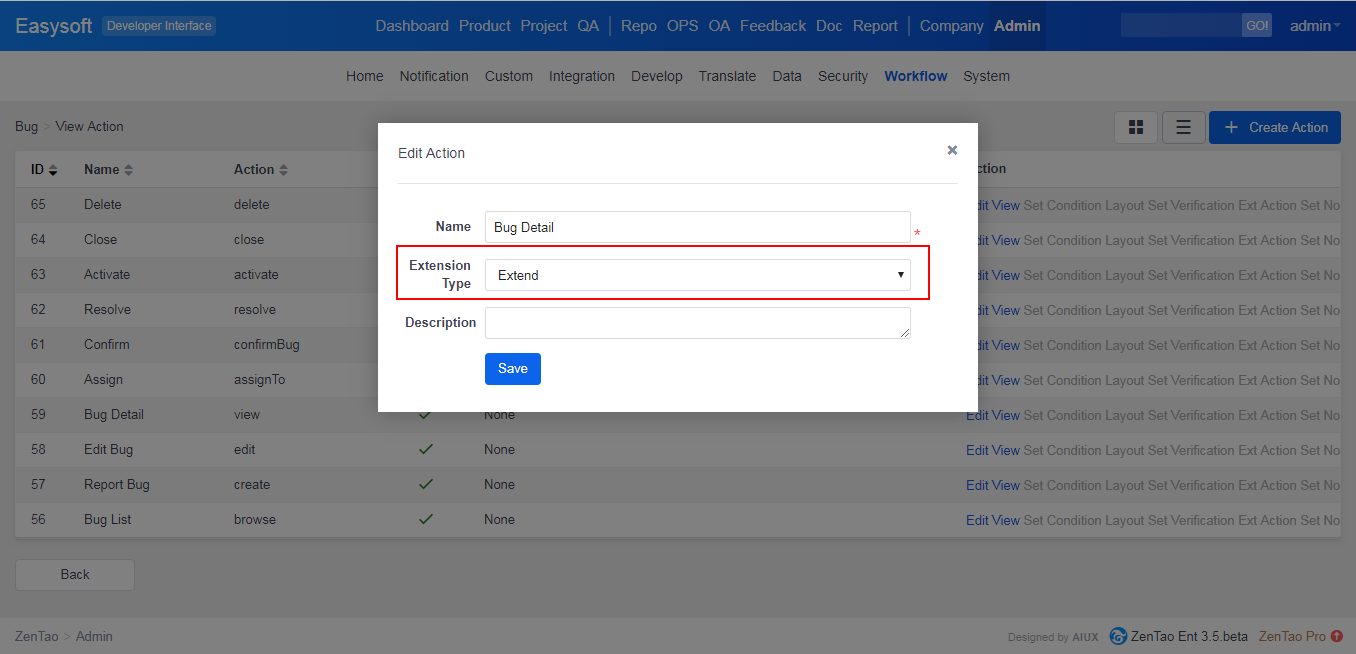
After you switch to Extend, the Layout and Extended Action can be used.
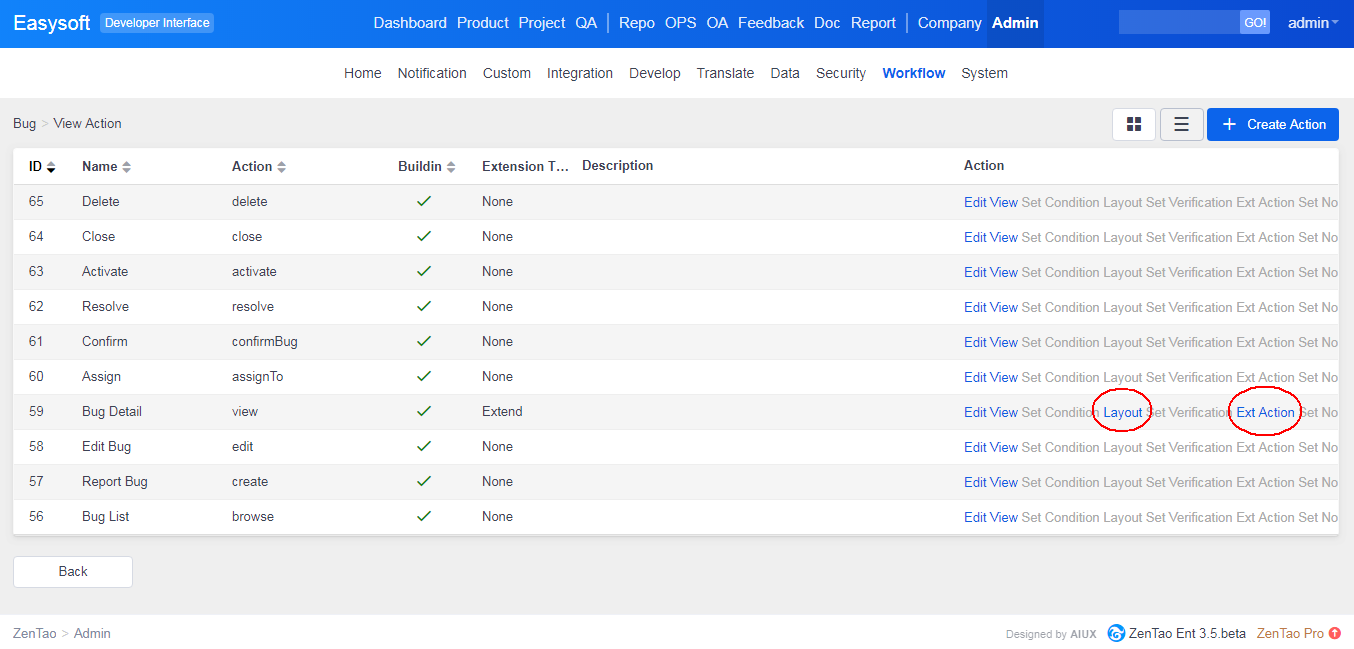
Click Layout and edit it. You can see the Review Result field just added and check whether it is displayed in the right position.
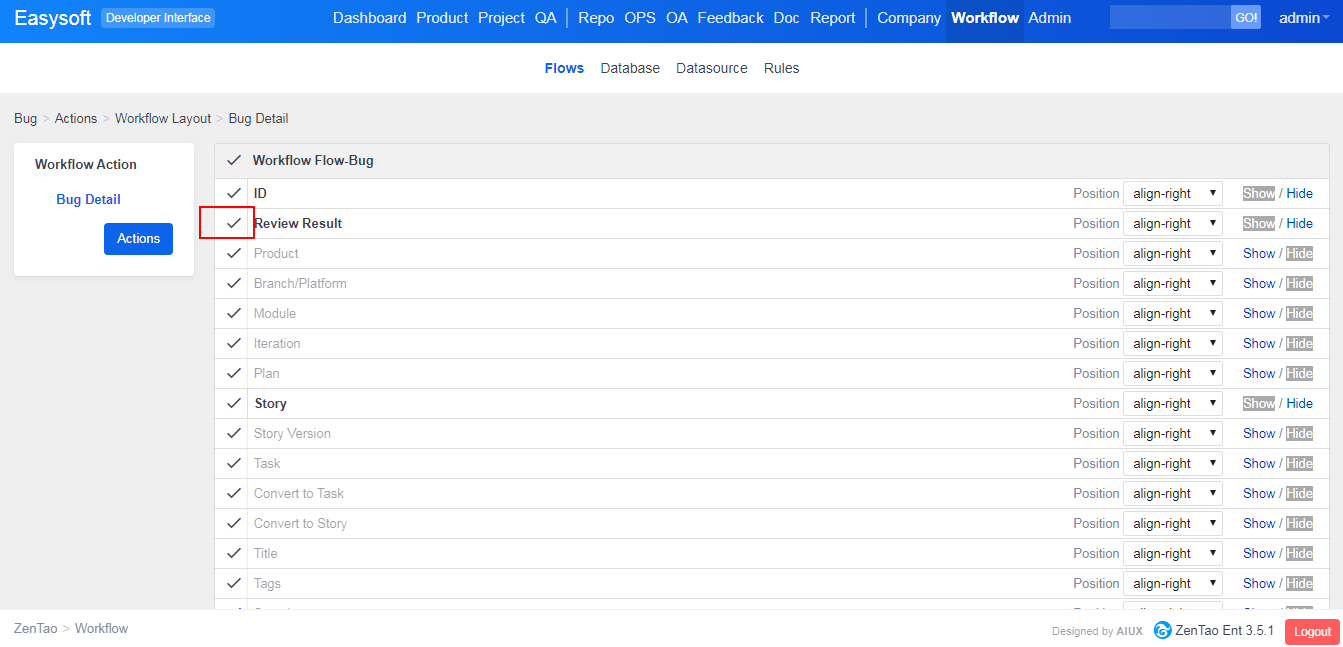
- Position: It is where and what is displayed.
- Basic Info: It is basic information displayed on the right column of the bug details page.
- Details: It is details displayed on the left column of the bug details page.
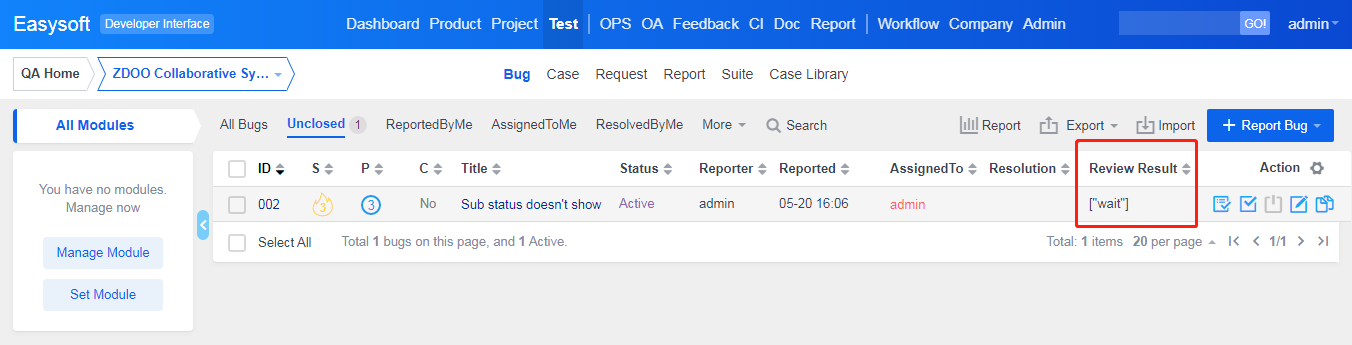
After the Review field is added, you will see it on the bug details page. If it is hidden, the Review field will not be displayed on the details page of a bug.

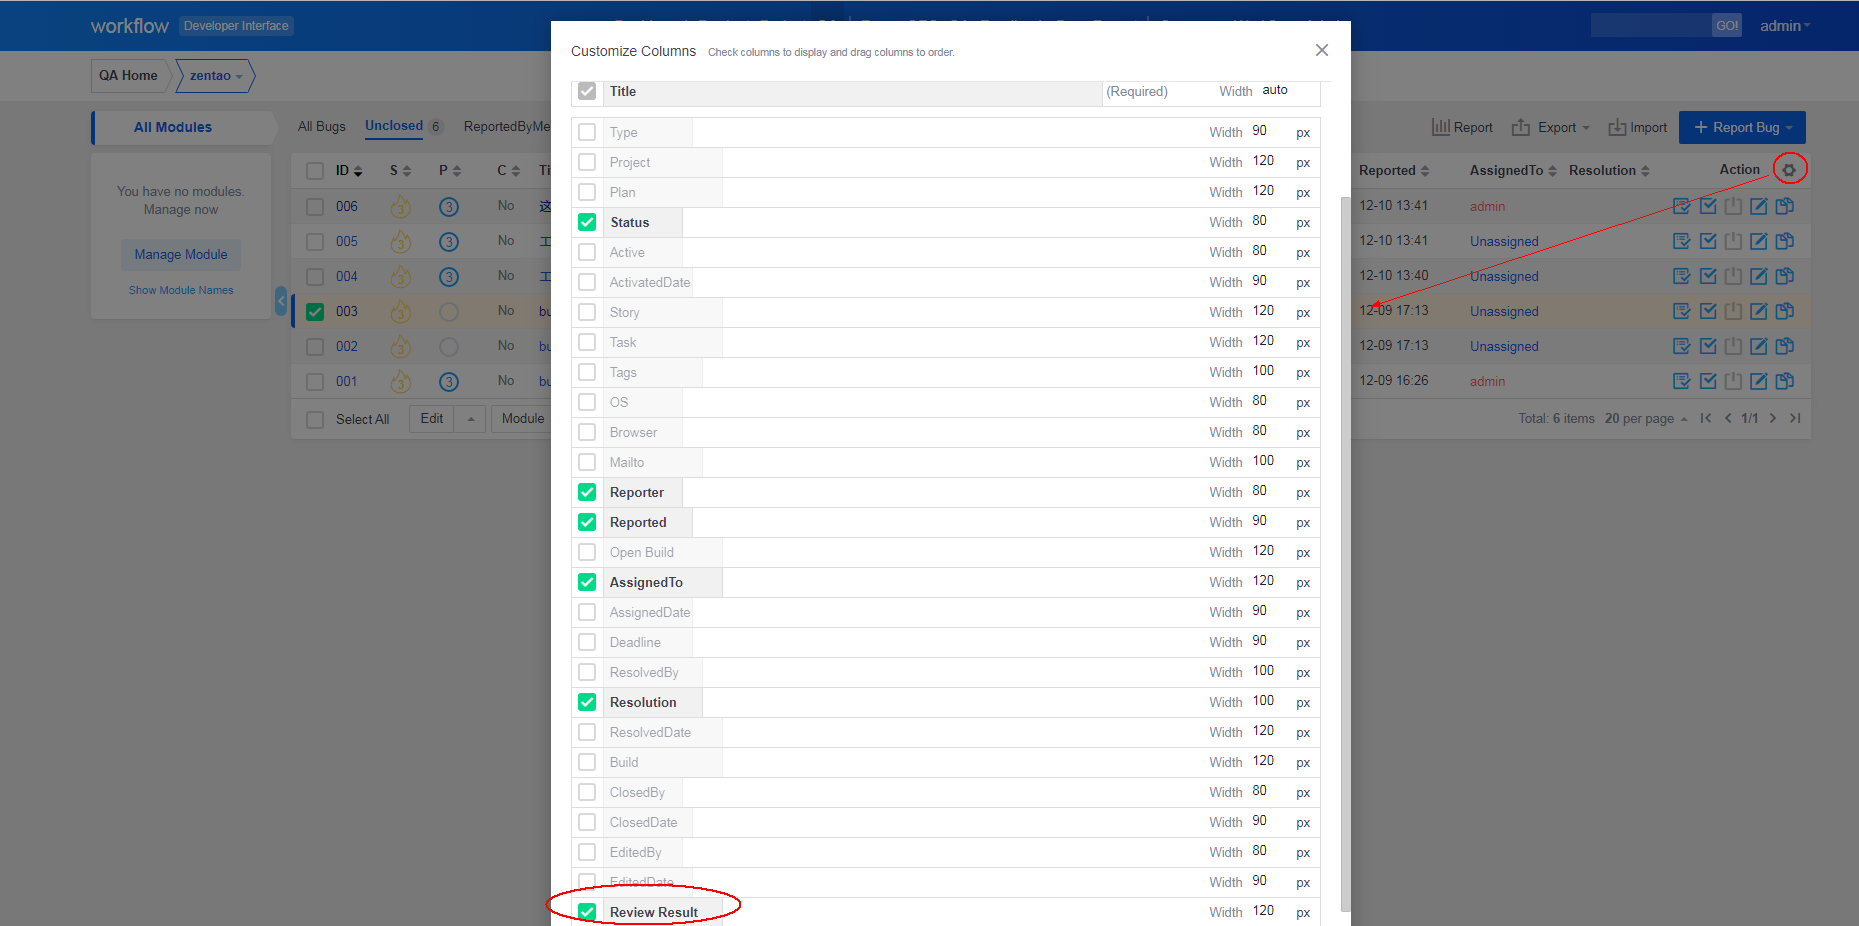
It is also displayed on the bug list page, if you customize the display of fields for the list. If the Review Result field is chosen, you will see it on the list page.
3. 2 Create an Action
Click Create Action on the action list page, and you can start to add an action for a build-in workflow. Below is an example of adding a Review action to Bug workflow.
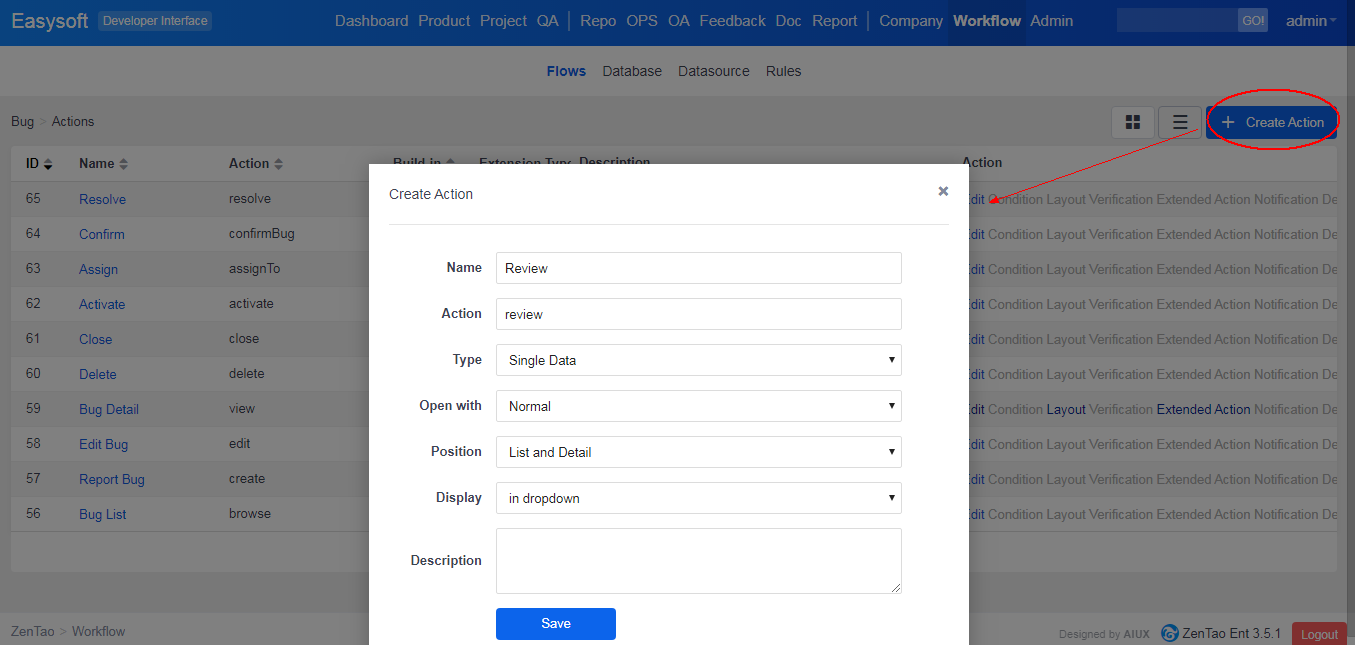
- Name: Name of the actions just created.
- Alias: It is the alias for the added action, no space or special characters are allowed. Once it is saved, it cannot be changed later.
- Open with: The way to open the page, including Normal, Popout, and None.
- Position: It is where the action will be displayed, including Menu, List, Details, and Both List and Details pages.
- Display: It is how the action is displayed, including on the page and in the drop-down.
- Description: A description of the action.
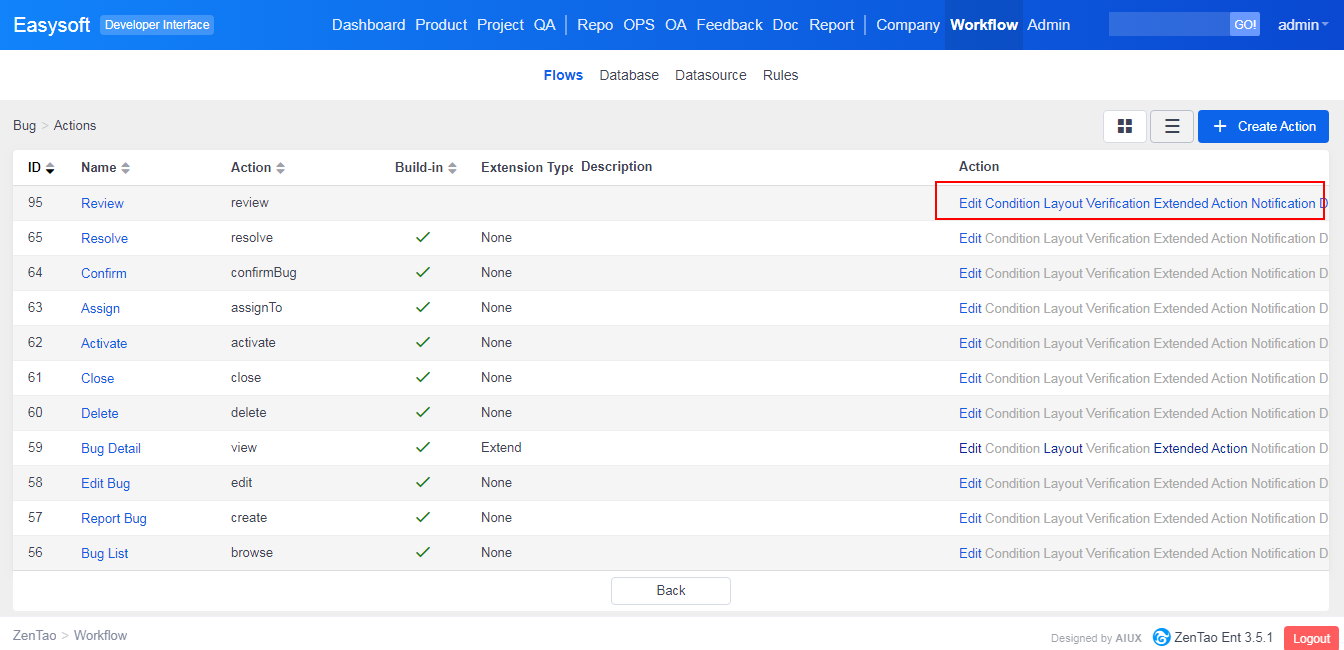
After the action is added, you can edit, view, add conditions, set the layout, add extended actions, set notifications, and delete the action.
3.3 Condition
Conditions can be set to trigger an action. It is under the condition that an action will be triggered, which means you can do the action under this condition.
Click Condition and enter the page to set conditions.
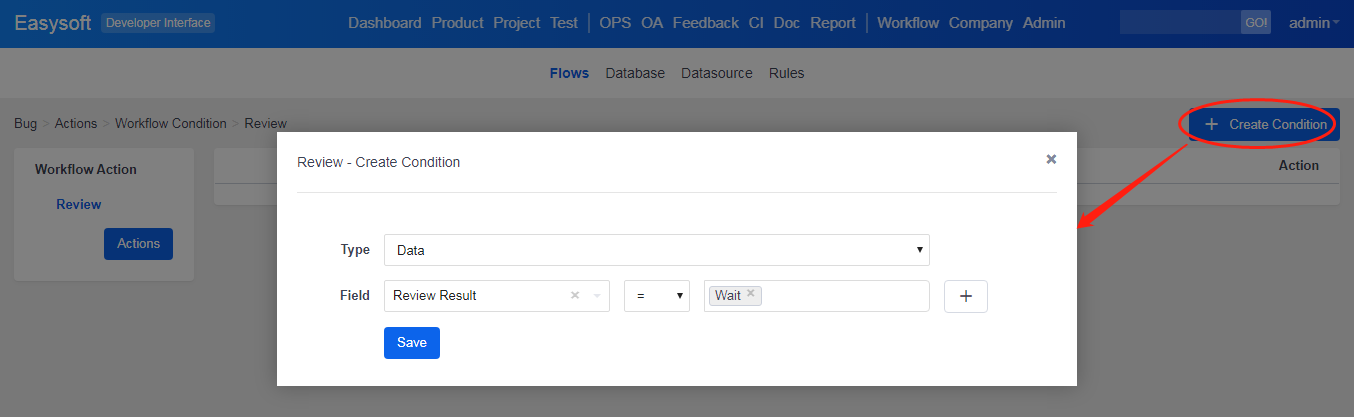
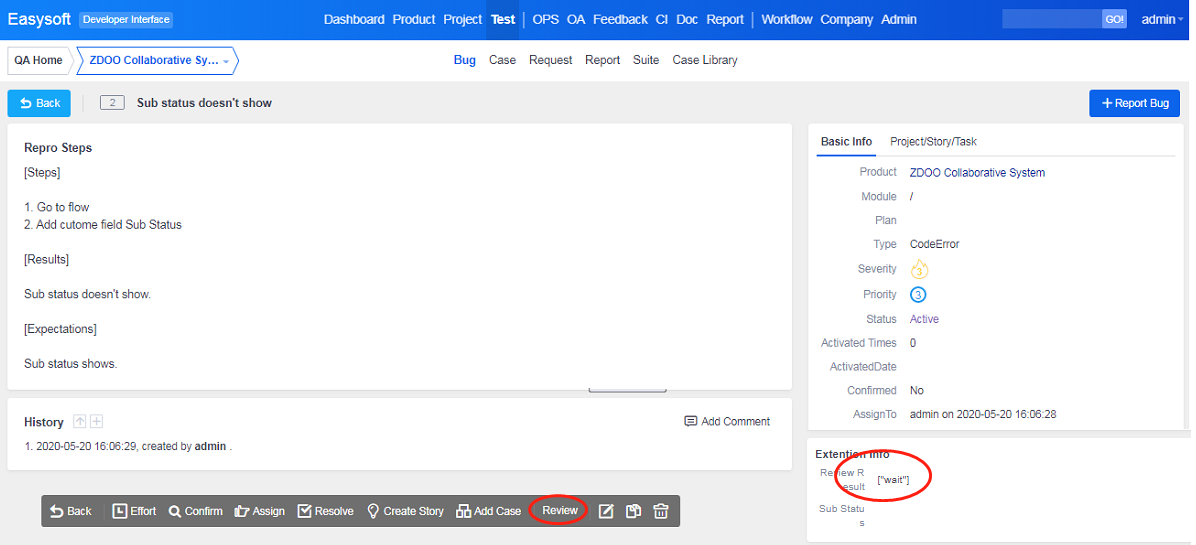
After you click Save, go to a bug details page and you will see a Review button and the Review results.
3.4 Layout
After you add an action, you have to set the layout for it, which means you have to set what fields and contents you want see displayed on the layout of the action.
Click Layout and enter the page to set the layout.Click Edit button at the bottom of the page and you will see all the fields that are related to Bug workflow listed. Make sure that you have checked the Review action that you just added. You can also set it as Hidden or Show.
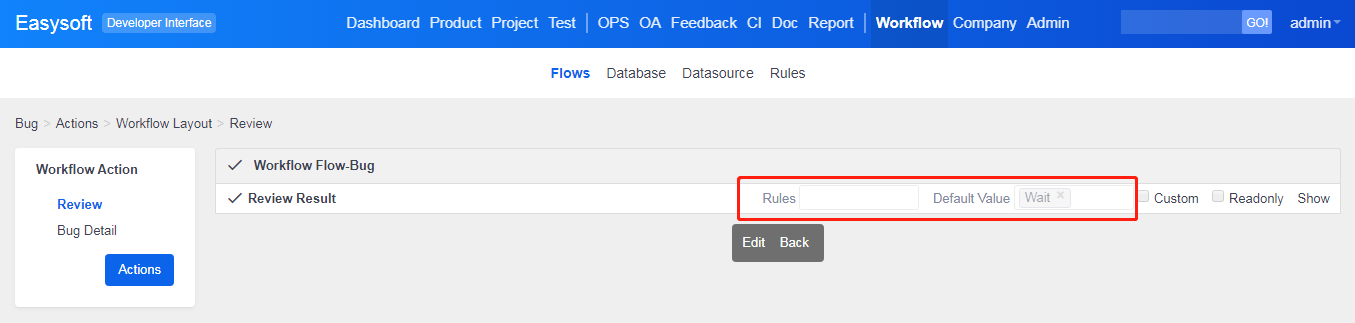
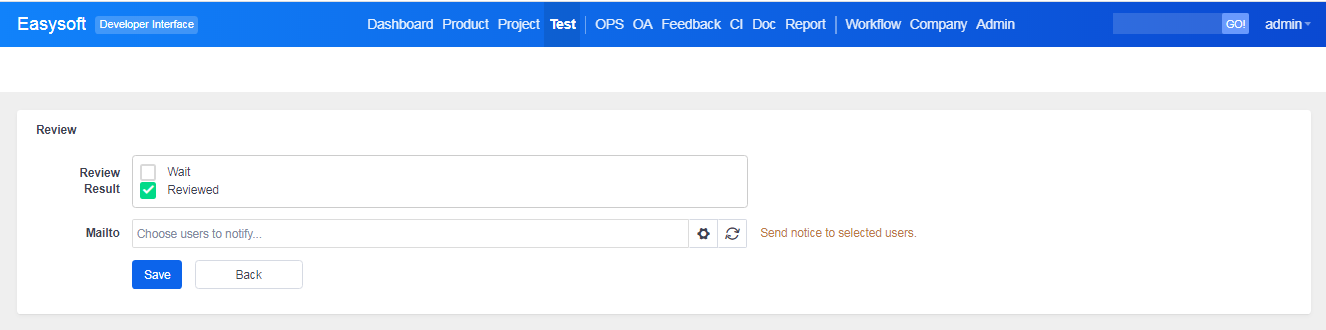
Now go to the Review page and you can see all you just set for the action displayed.
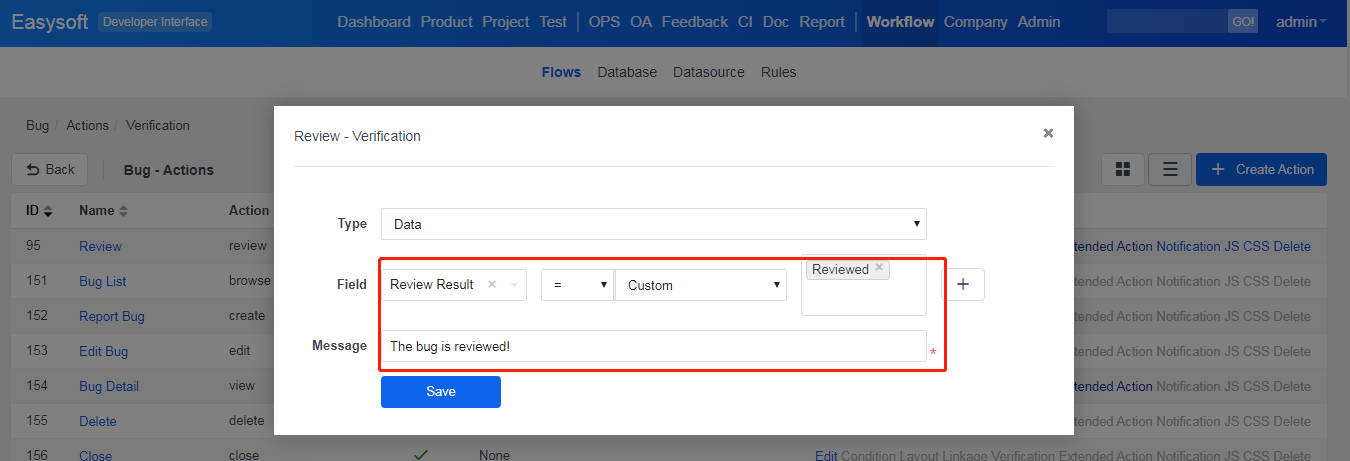
3.5 Rules
Rules are set to verify the data of an action and display tips when a fields is a certain value.
Rules options are data and SQL.
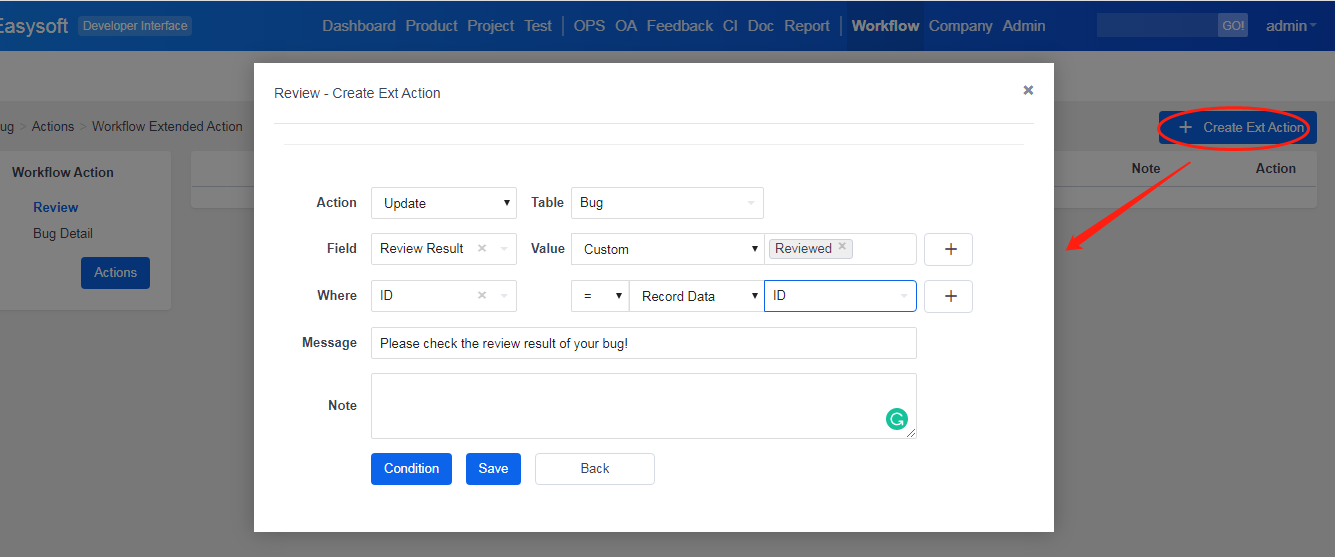
3.6 Extended Action
You can add extended actions to an action and update the related data once the action is done. You can set under what conditions the extended action is trigger and the tips for it. It is similar to set conditions for an action.
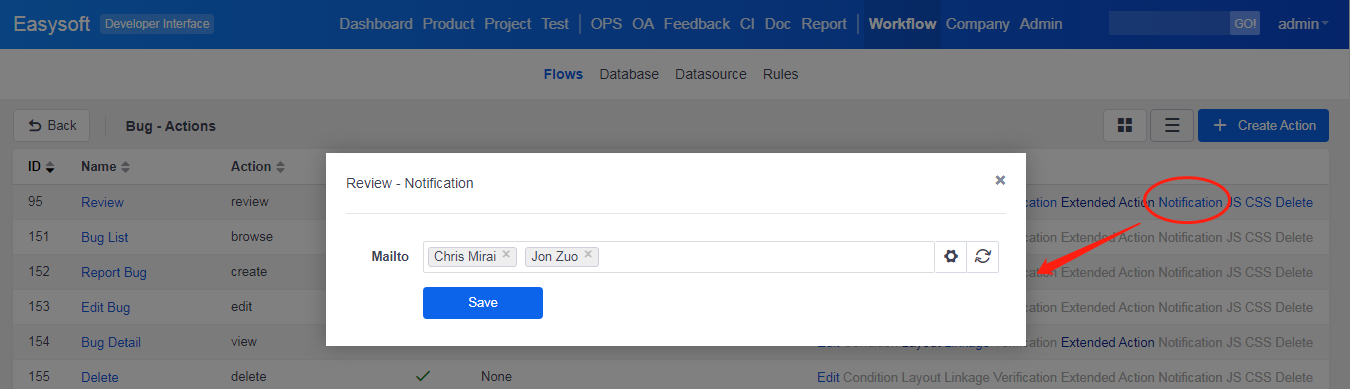
3.7 Notification
It is to send emails to users to notify them about the action after the action is done.
Click Notification to set it. Make sure that you have set your email in Admin->Notification, and the user emails are recorded in Company->User.
4. Sub Status
Sub Status is added to ZenTao Enterprise 3.5.beta
Every field is part of the program in ZenTao and is calculated, so it is inconvenient for users who would like to customize it. With the Sub Status feature, you can add a sub status to customize the workflow in ZenTao to fit your requirements.
A sub status is displayed as a field in the field list. Below is an example of customizing a sub status for tasks.
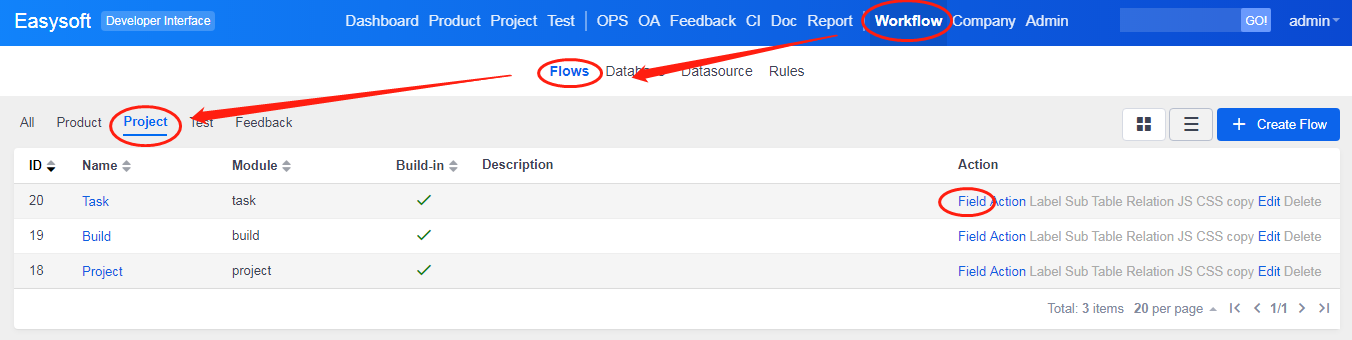
4.1 Create a sub status
Click Field of Task, and enter the field list page of the workflow.
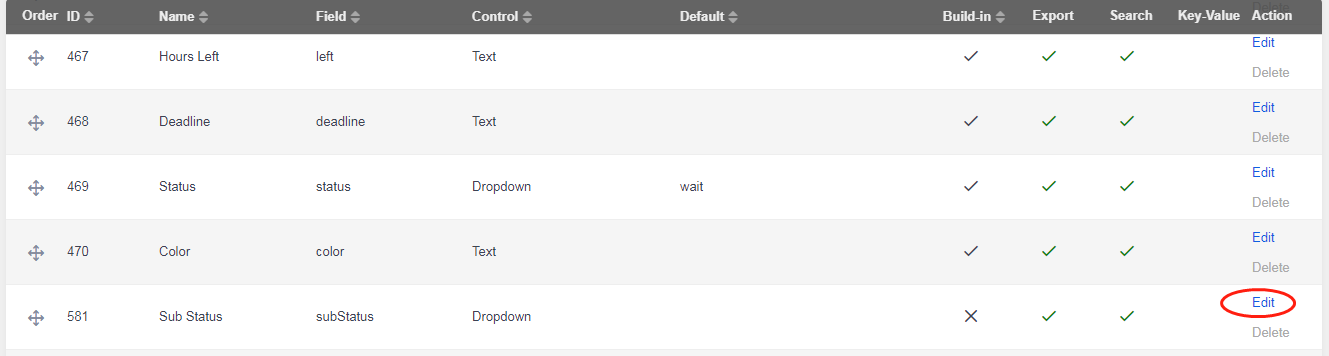
Find Sub Status in the field list, and click Edit to enter the page to edit the field.
The page of Edit is shown as below. Add a sub status, and enter the key and the value for it.
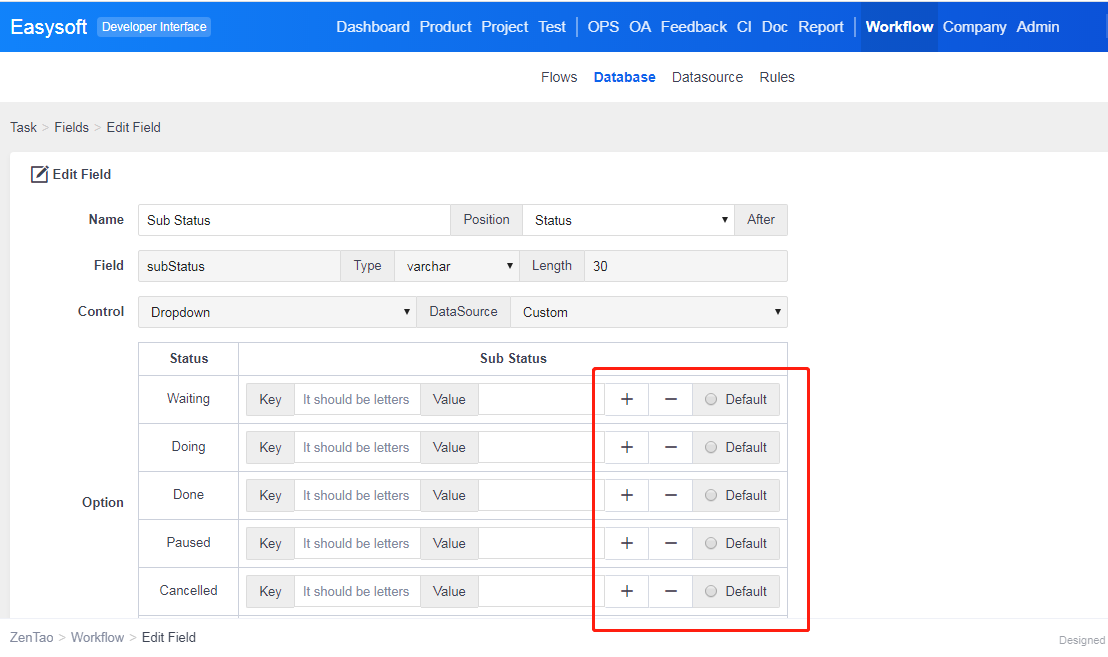
Key can be letters and numbers; value should be set according to your actual requirements. For each sub status, you have to set a default value.

Then go to Task->Kanban->Kanban Settings to do settings for the sub status.
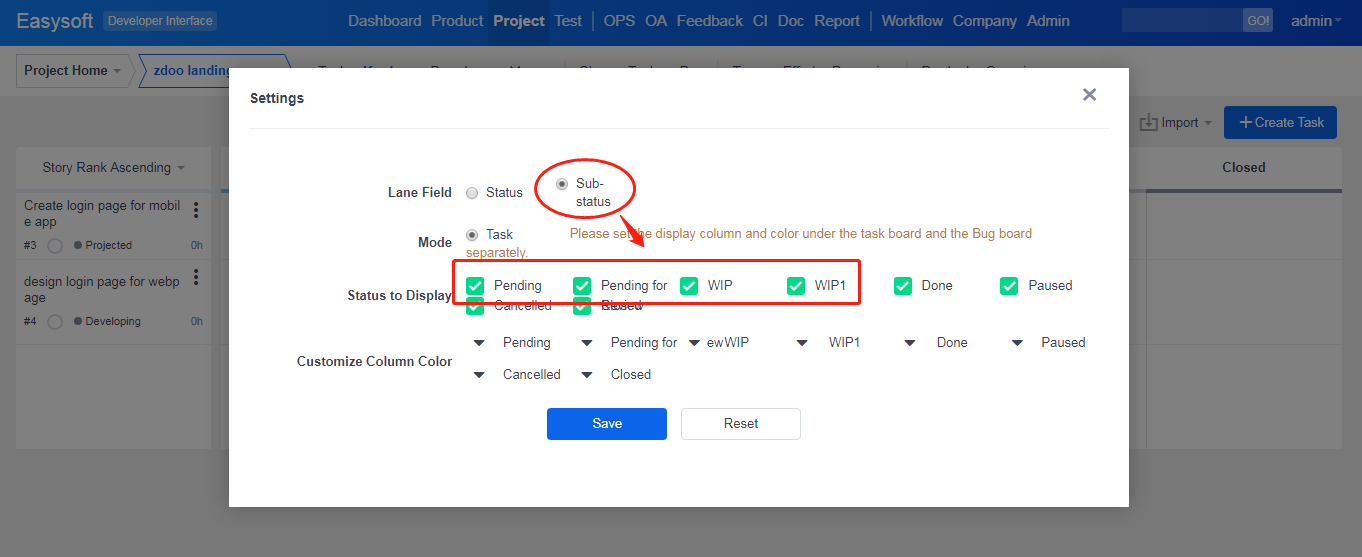
- Field- Default settings is not Sub Status. Click Sub Status to display it.
- Mode- Task Kanban and Bug Kanban are separated, so you have to choose one to set up.
- Display- Default settings is to choose sub statuses to show on Kanban.
- Color- Colors have to be set and customized after the sub status is set on.
- Reset- Reset to dedault.
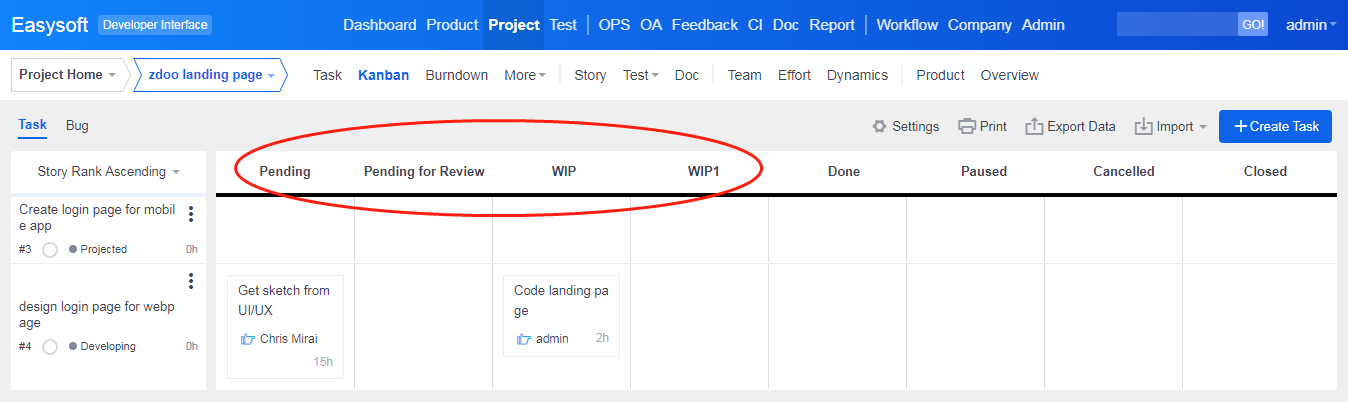
After you finished the settings, you can check the status of tasks by drag-and-drop, or you can edit the task to change its status.
Produit
- ZDOO
- ZDOO Cloud
- ZSITE
Contactez-Nous
- A propos de nous
- Courriel: Philip@easycorp.ltd
- WhatsApp: 0086 18563953295
- Skype: philip517


