
- About ZenTao Enterprise
- Installation
- Update and Upgrade
- 3 Update ZenTao Enterprise
- 3 Upgrade from Open Source to Enterprise
- 3 Upgrade from Pro to Enterprise
- Users and Privileges
- DevOps Management
- Office Automation
- Feedback Management
- Document Management
- Workflow
- 9 Build-in Workflow
- 9 Workflow Introduction
- 9 Example: Customize Build-in Workflows
- 9 Example: Add a Workflow
- 9 JS and CSS
- ZenTao Desktop
Example: Add a Workflow
- 2019-09-03 13:09:50
- John Ten
- 3761
- Final Edition:tengfei De 2020-05-21 15:18:13
You can add a new workflow to ZenTao, besides you can customize and extend the build-in workflows.
Tips for creating a new workflow,
- Prepare the requirements for the new workflow.
- Add the workflow according to the requirements and add fields for it.
- Add actions according the changes of its status and set the layout.
- Set the conditions, rules, extended actions, and notifications according to the privileges of the action.
- Add labels according to privileges.
- Set privileges in Admin->Privilege.
1. Prepare requirements for the new workflow
The first thing to do is to collect and understand the requirements of the workflow, including fields, actions, sub flows, data source, privileges, etc.
Take Meeting Roomas an example to add a new workflow for it. Meeting Room is the workflow, and Add Room is its Relation. Relation is to set cross-workflow relations.
Workflow: Meeting Room
- Field- ID, Meeting Room, Start Time, End Time, Booked By, Description, Parent Flow ID, Created By, Created Date, Edited By, Edited Date, Delete.
- Action- Book, Edit, Details, View List, Delete.
- Rules- Display a note that the meeting room is booked when a user tries to book the meeting room which has been booked already.
- Label- All Bookings, My Bookings
- Privilege- Set privileges according to actions and labels
Relation: Add Room
- Field- ID, Meeting Room Name, Location, Capacity, Equipment, Open Day, Parent Flow ID, Created By, Created Date, Edited By, Edited Date, Delete.
- Action- Add, Edit, Details, View List, Delete.
- Label- All, 1st Floor, 2nd Floor, 3rd Floor
- Data Source- Equipment(computer, speaker, microphones, projectors, whiteboards); Open Day (Monday, Tuesday, Wednesday, Thursday, Friday, Saturday, Sunday )
- Privilege- Set privileges according to actions and labels
2. Create a workflow and add fields
When the requirements are collected and well prepared for, you start to add the workflow for it.
2.1 Create Field
Go to Workflow->Flow and click Create Field. Enter the information about the meeting room booking in the pop-out window.
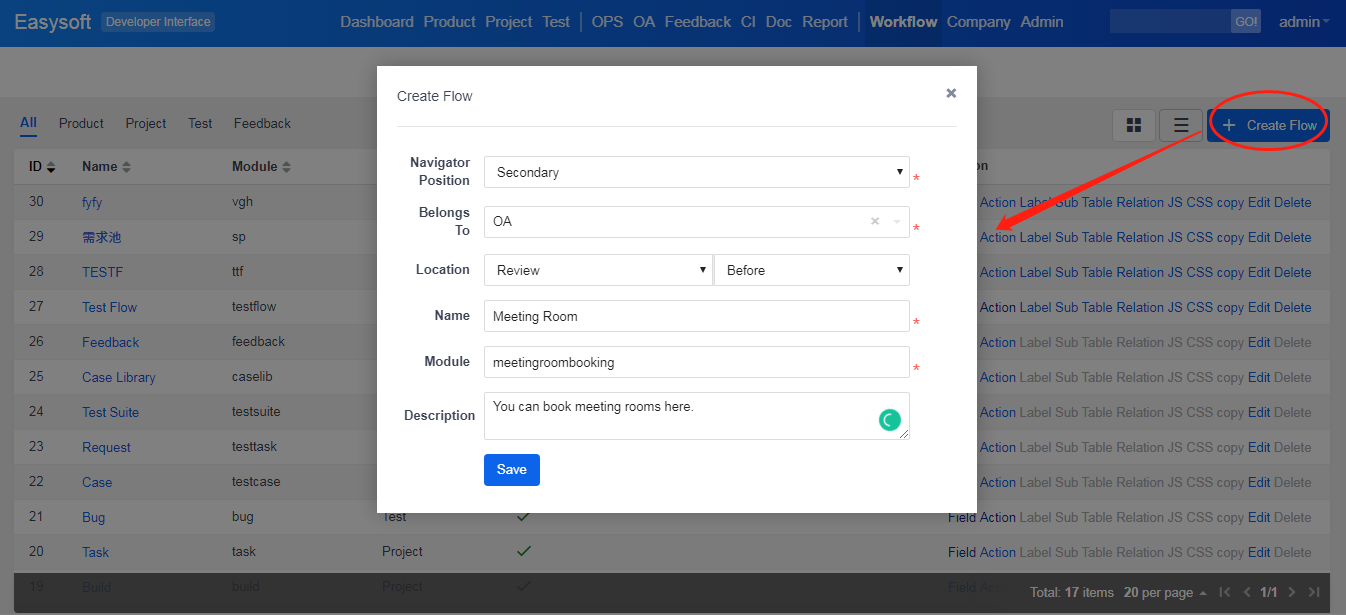
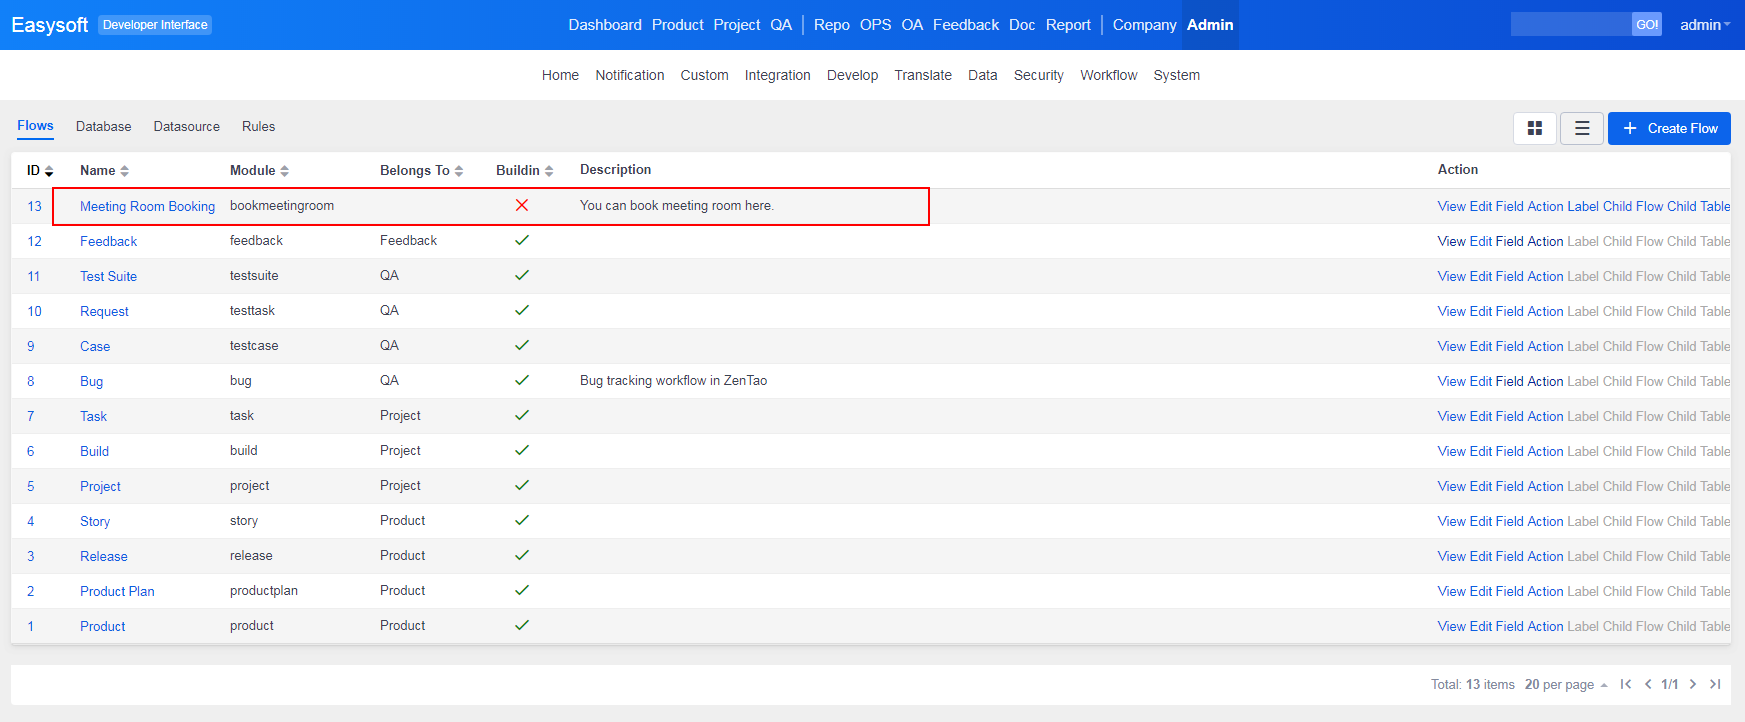
After it is created, you can see the flow listed in the Flow list.
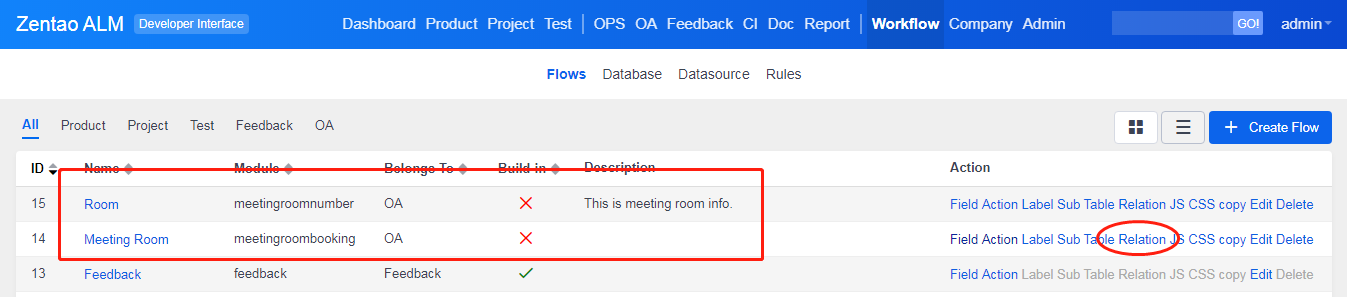
Create Room as another workflow which has Reklation to Meeting Room. You can add fields for it according to your requirements, and set the type of controls and rules for it.
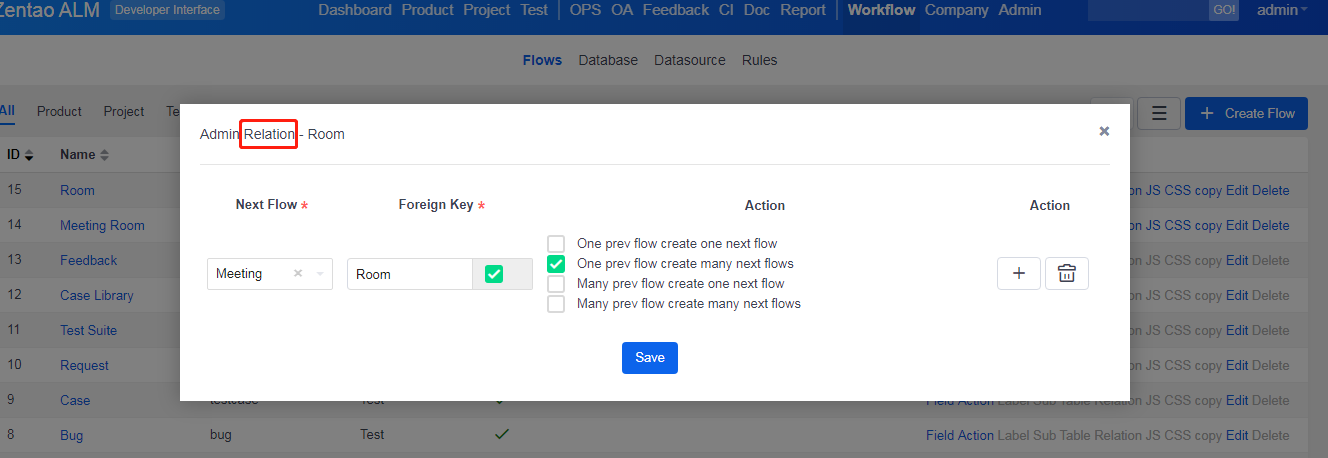
Then Add a field named Room to Meeting Room workflow.
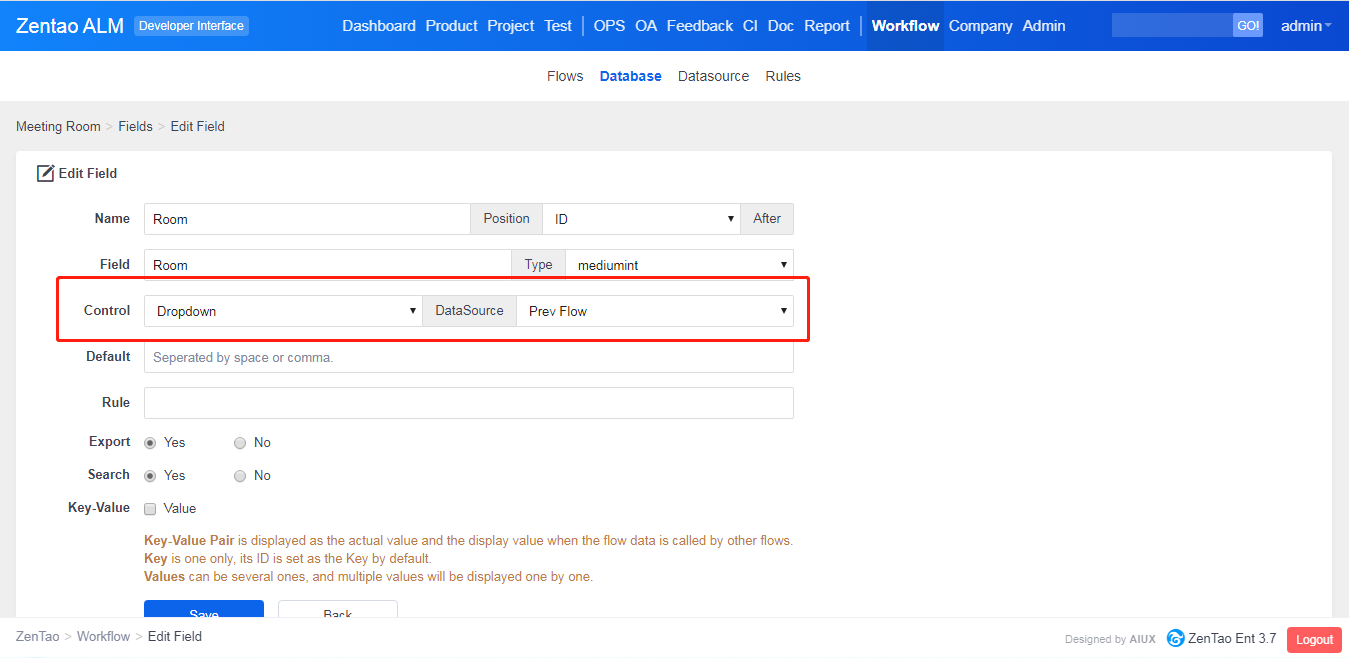
- Key-Value Pair is displayed as the actual value and the display value when the flow data is called by other flows.
- Key is one only, its ID is set as the Key by default.
- Values can be several ones, and multiple values will be displayed one by one.
3. Add conditions and set the layout
After Meeting Room, you can add actions for it.
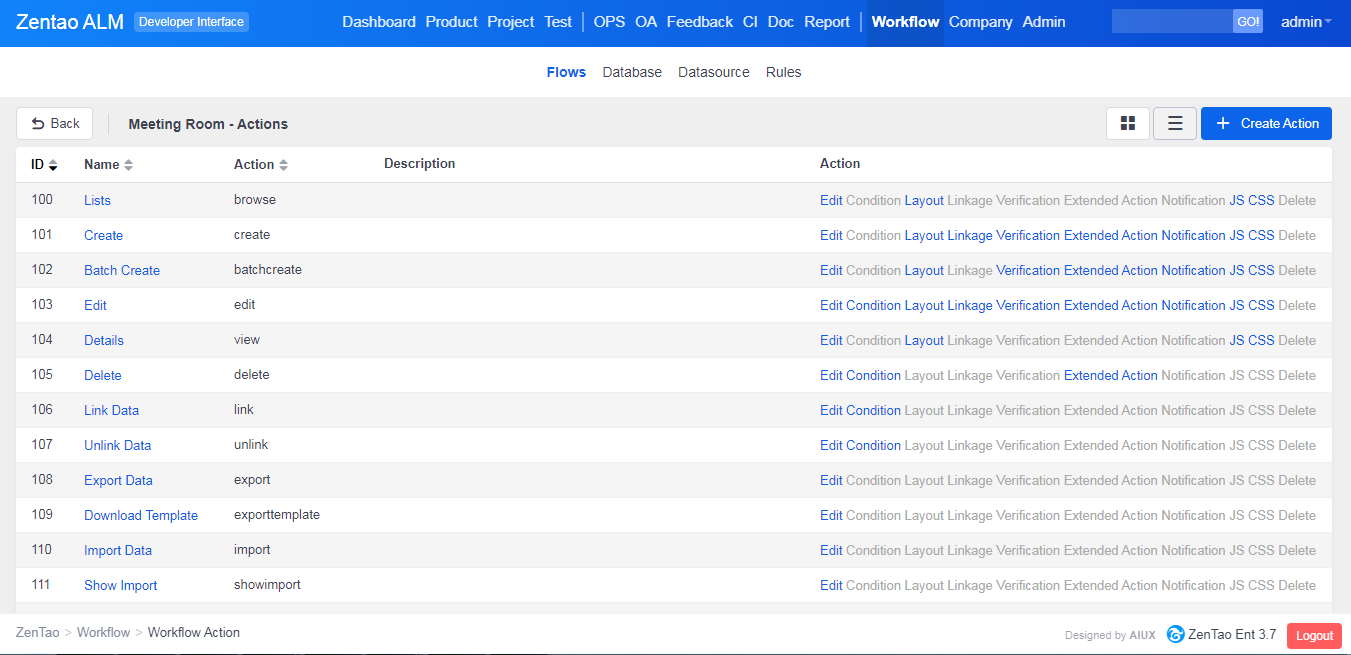
3.1 Add an action
Below is the default action list. You can edit the action or add a new action according to your requirements.
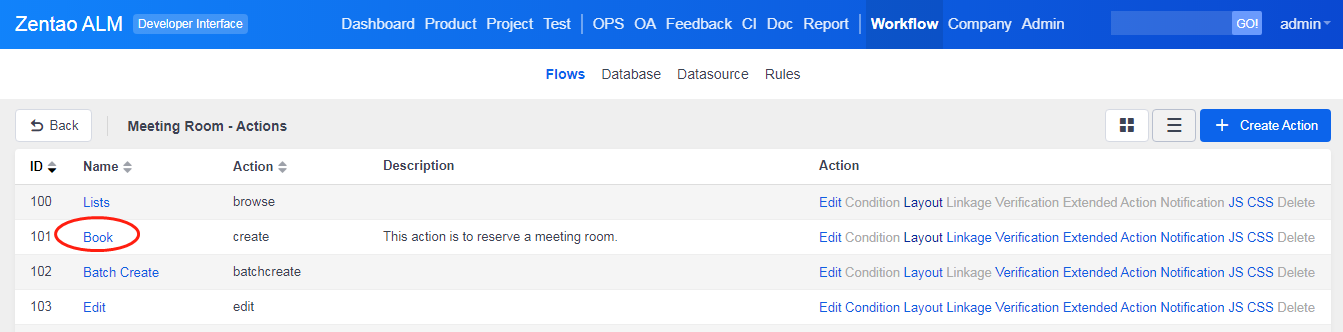
Edit the Create to Book.
3.2 Set the layout
Layout is about the fields and its rules and default values that will be displayed on the interface of Create Action.
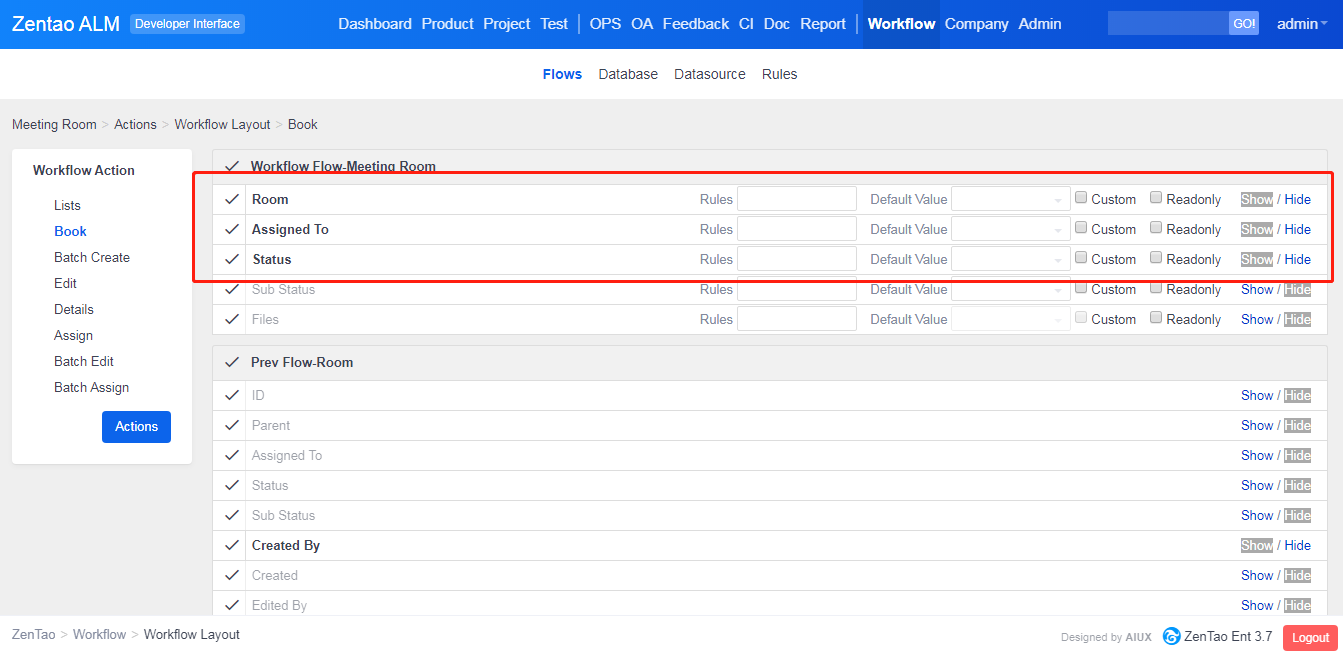
Set the fields for each action and hide the field if you don't want to display it.
4. Verification and Notification
After the action and its layout have been set, the next step is to check whether verification, extended action, and notification are required to set for the action.
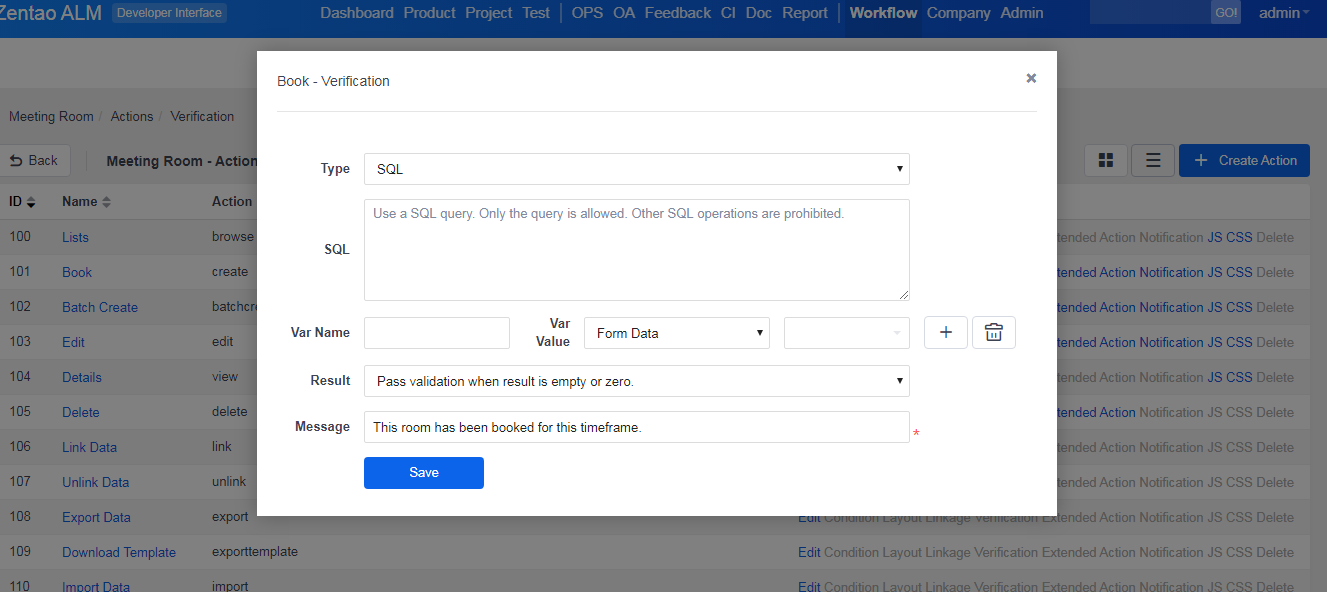
4.1 Verification
Verification is to verify the data when booking and editing a meeting room. If the meeting room is booked, a notification should pop out to remind the user of that.
Choose SQL as verification and enter statements below.
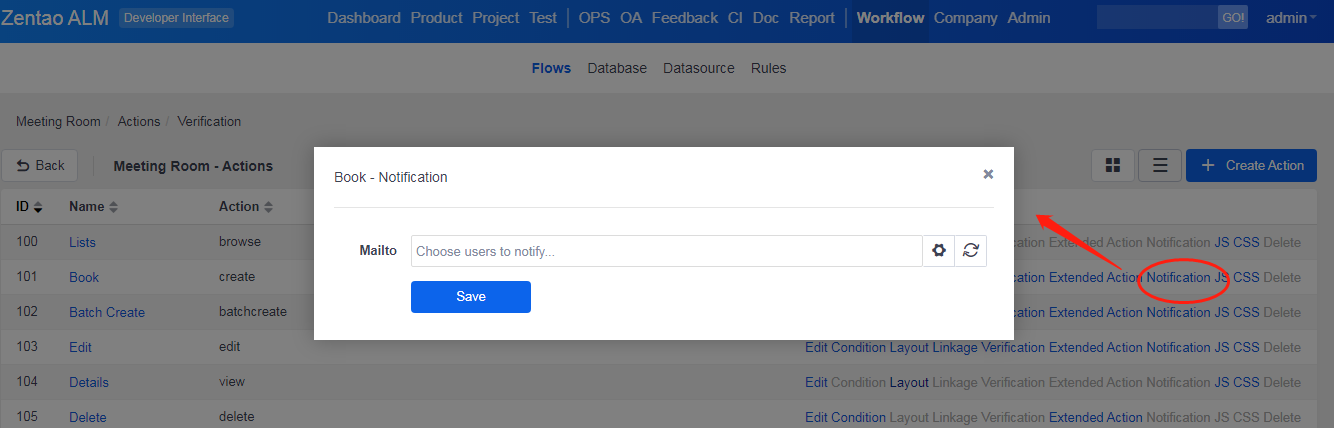
4.2 Notification
Notification is to set emails to users. When booking or editing a meeting room, the notification will be sent to meeting attendees. Make sure that you have set your email in Admin-> Notification and entered the user's emails are in Company-> User.
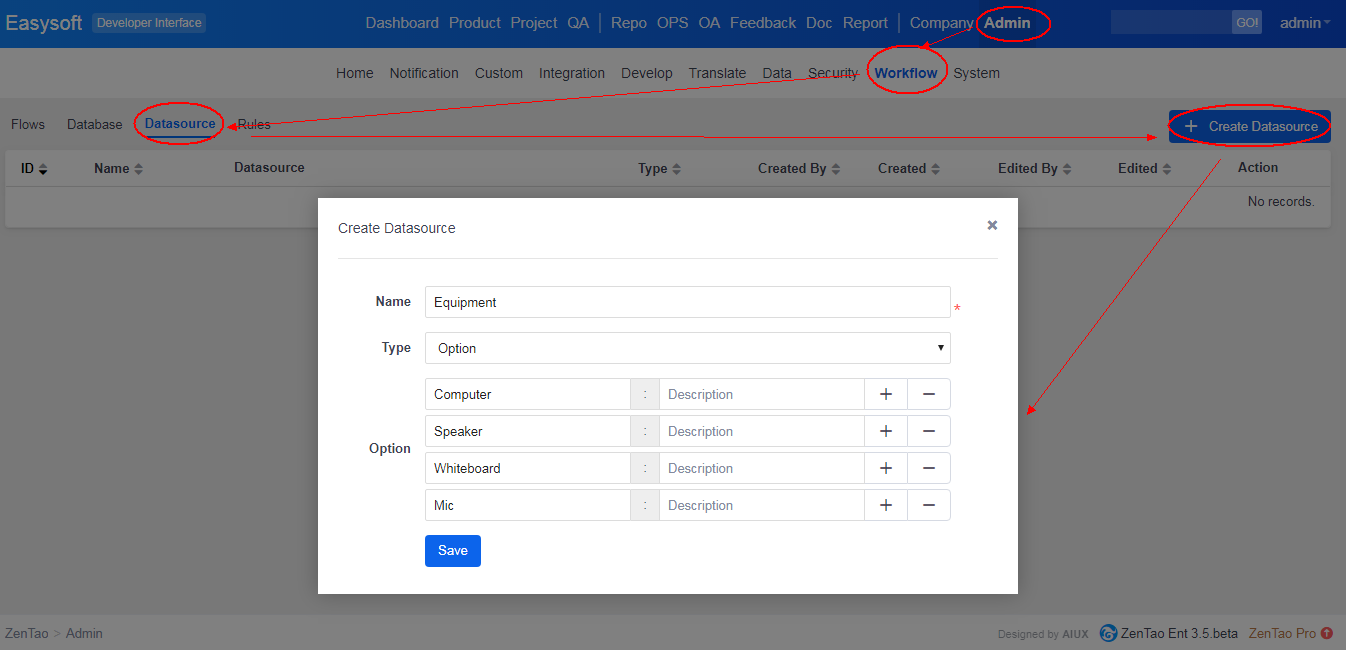
5. Data Source
The types of data source are involved in Meeting Room Booking and Meeting Room, namely User, Equipment, and Work Day. User is a default data source in Flow, so you don't have to create one.
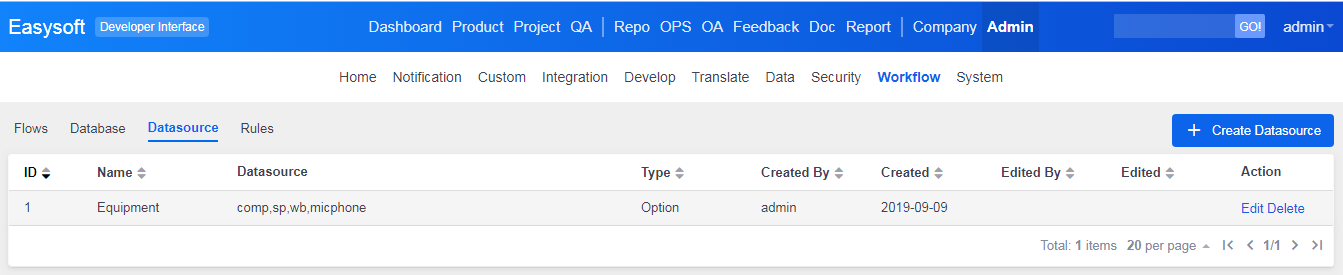
Go to Admin->Workflow->Datasource->Create Datasource.
Click Save and you will see in the list of Datasource.
6. Label
Set labels for different privileges and filter the data.
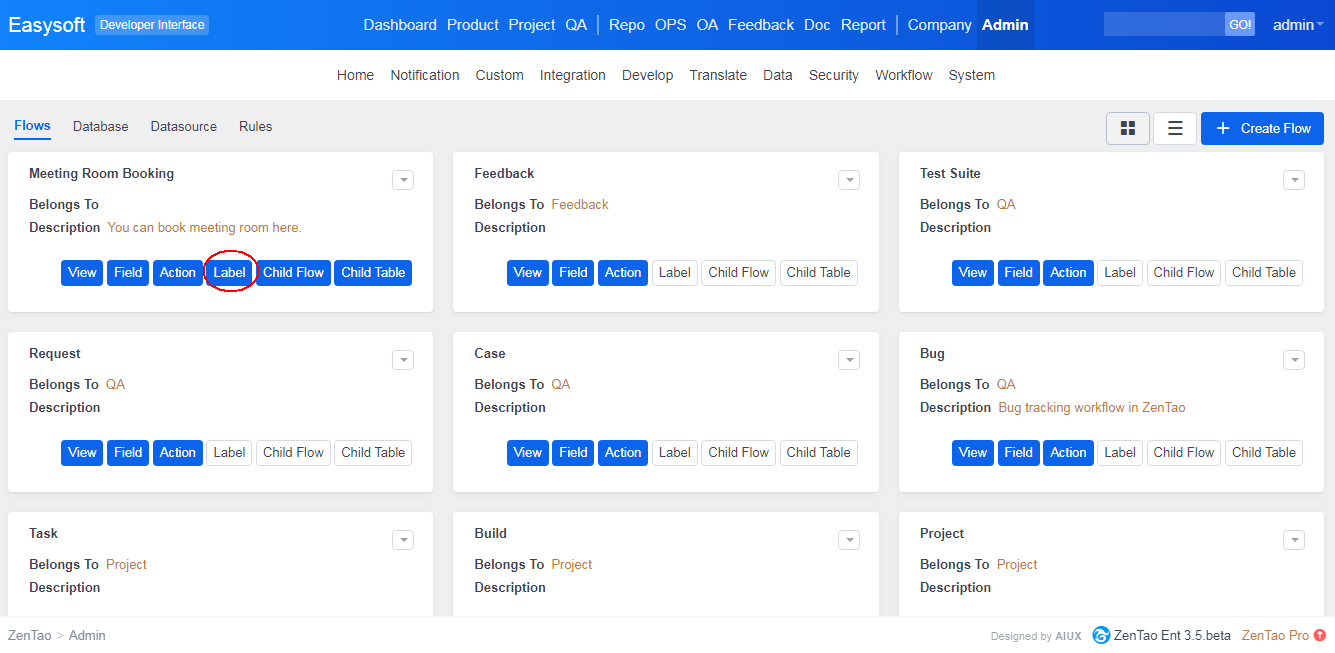
Click Create Label and Save it after you enter the information.
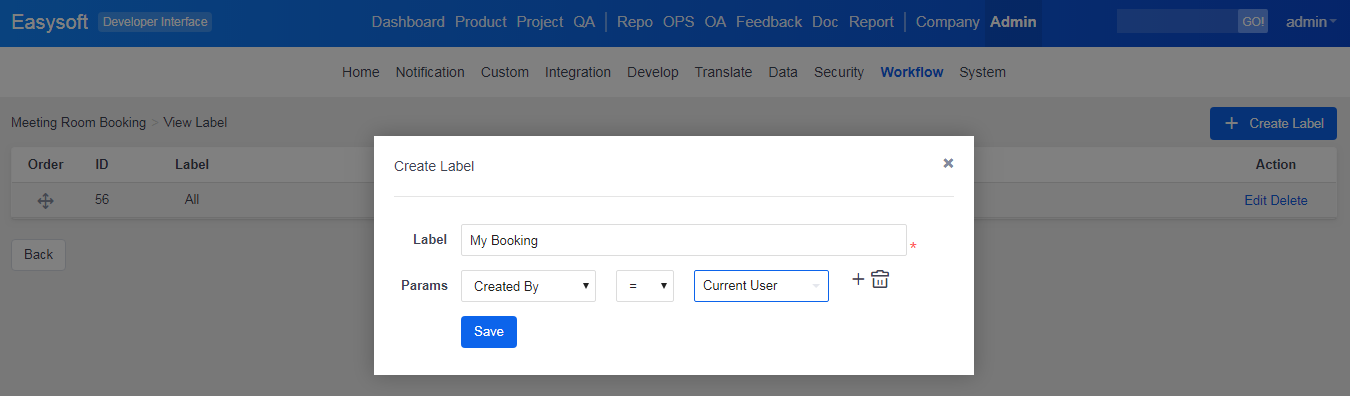
Then you can check booking by All or My Booking.
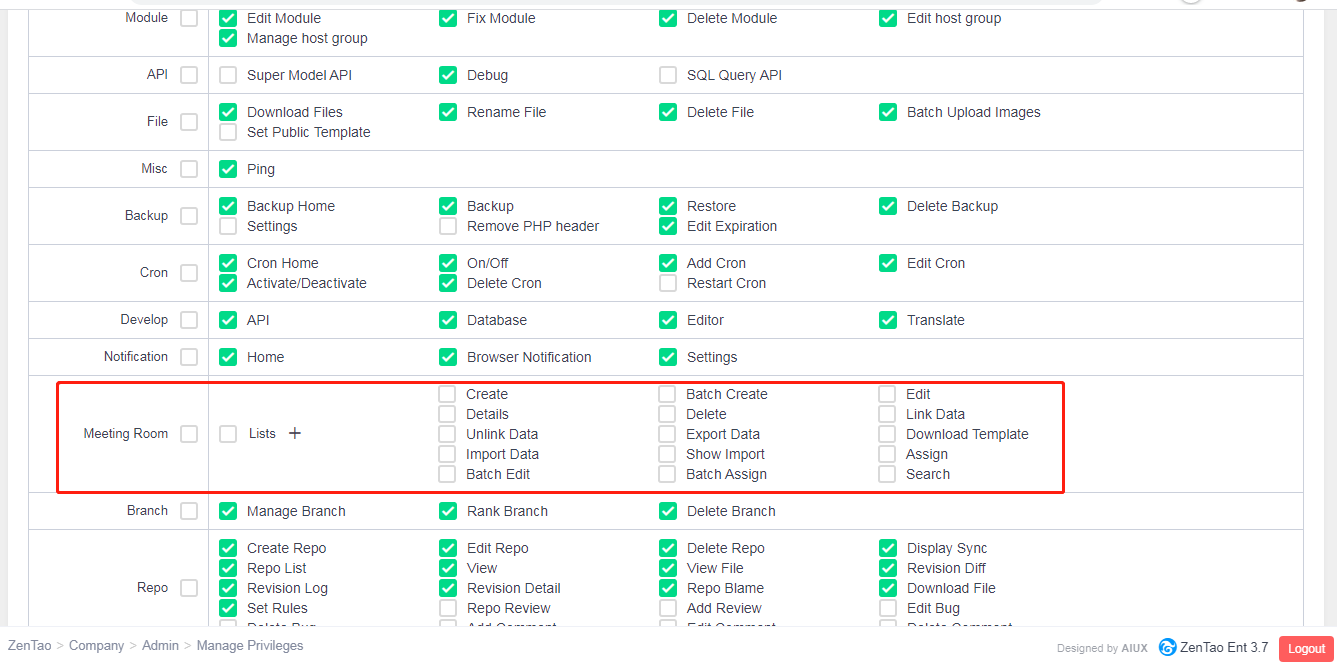
7. Privilege
You can set privileges in Company->Privilege for the workflow. Click "+" and you can set the privilege of labels.
8. Example
After the Meeting Room Booking is added to ZenTao, let's see how to book a meeting room in ZenTao.
8.1 Add Meeting Rooms
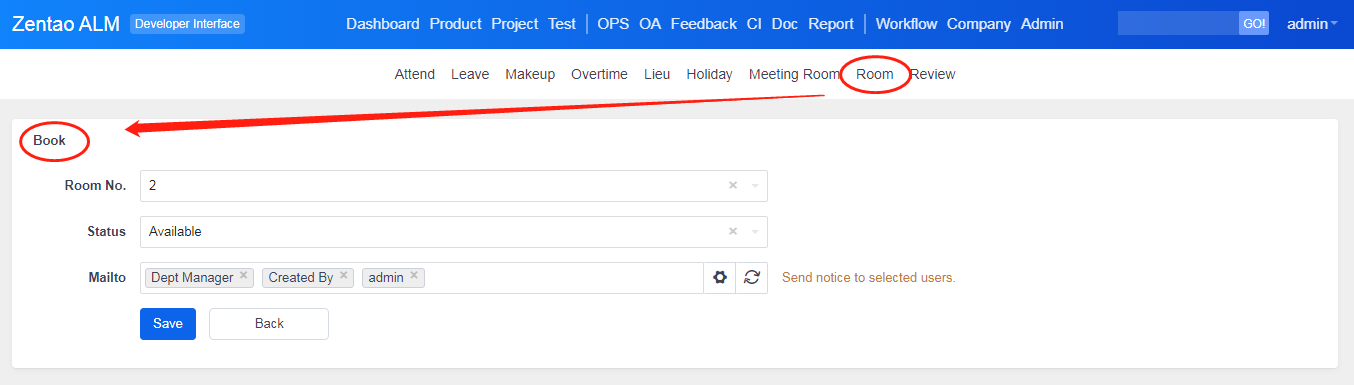
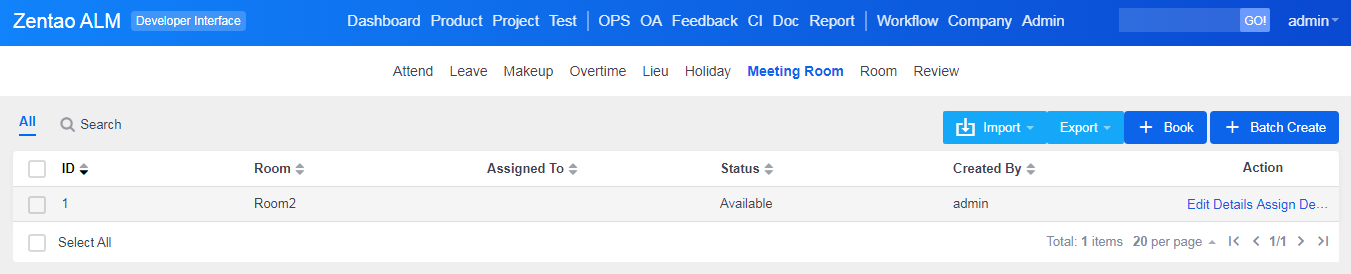
8.2 Submit a booking request

Then you will see the meeting room listed below.
Produit
- ZDOO
- ZDOO Cloud
- ZSITE
Contactez-Nous
- A propos de nous
- Courriel: Philip@easycorp.ltd
- WhatsApp: 0086 18563953295
- Skype: philip517


